How to Deep Clean a Bathroom Safely and Thoroughly
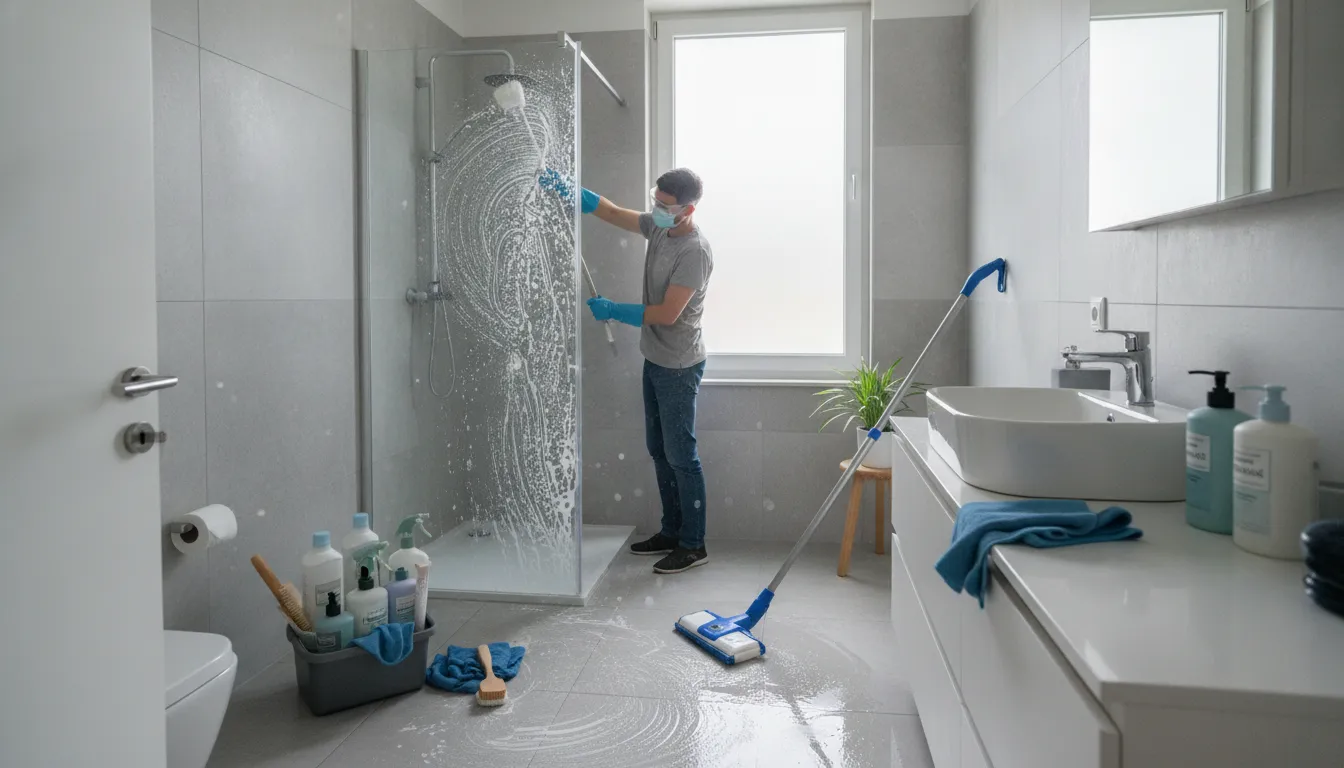
A spotless bathroom starts with more than a strong cleaner. The wrong product or scrubber can scratch acrylic, dull a finish, or harm natural stone. A safer routine begins with knowing what each surface needs and following the directions on every product you use. This guide breaks down how to deep clean a bathroom in a simple, practical order. You’ll find out what supplies to gather, how to prepare the room, and how to clean the shower, sink, toilet, and floor while keeping tools separate. We’ll also point out the easy-to-miss places where grime collects. Use these steps to make your next bathroom clean more thorough and less stressful.
Key Takeaways
- Match products and tools to each surface: Check care instructions, test unfamiliar cleaners in a hidden spot, and keep toilet tools separate.
- Work safely and in a practical order: Ventilate the room, never mix cleaners, follow label directions, and clean from high surfaces down to the floor.
- Make bathroom care manageable: Set a deep-cleaning schedule that fits how often the room is used, wipe up moisture between cleans, and consider professional help for stubborn buildup or regular upkeep.
What Supplies Do You Need to Deep Clean a Bathroom?
A little preparation makes bathroom cleaning easier and helps protect your finishes. Before you shop your cupboard or fill a caddy, check the care instructions for the surfaces in your bathroom, including tile, grout, glass, stone, acrylic, and metal fixtures. Products made for one material may not be safe for another. For example, an abrasive sponge can scratch some acrylic, while an acidic cleaner can damage certain types of natural stone.
Gather your supplies before you start so you don’t have to leave wet surfaces unattended or reach for a substitute product. Plan to use separate tools for the toilet and other areas, and keep clean cloths apart from used ones. Read each product label for directions on application, dilution, rinsing, ventilation, and protective equipment. If you’re unsure how a cleaner will affect a finish, test it in a small, hidden spot first.
A well-organized caddy can keep the process efficient, but store products in their original containers and out of reach of children and pets. If a surface has delicate finishes or stubborn buildup, check the manufacturer’s care guidance before scrubbing. The right supplies help you clean thoroughly while reducing the risk of surface damage.
Gather gloves, microfiber cloths, non-scratch sponges, suitable brushes, a toilet brush, and a mop
Start with rubber gloves, several clean microfiber cloths, non-scratch sponges, and brushes suited to the surfaces you’ll clean. A soft-bristled brush can reach corners and around fixtures, while a grout brush may help with narrow joints. Keep a dedicated toilet brush for the bowl, and have a mop ready for the floor.
Use fresh cloths as you move between areas, especially after cleaning the toilet. Set used cloths aside for laundering instead of returning them to your clean supply. Nationwide’s bathroom cleaning checklist also recommends gloves, microfiber cloths, scrub brushes, a toilet brush, sponges, and a mop. Before you begin, check that each tool is clean and in good condition. Avoid using a rough or worn scrubber on delicate finishes.
Choose cleaners that match care instructions for tile, grout, glass, stone, acrylic, and metal
Choose cleaning products according to the material, rather than assuming one bathroom cleaner suits every surface. Tile and grout, natural stone, acrylic tubs, glass, and metal fixtures can each have different care requirements. An abrasive pad may scratch acrylic, and an acidic product may harm some stone or finishes.
Read both the surface manufacturer’s care instructions and the cleaner’s label before use. If you’re not sure what a surface is made of, check with the manufacturer or choose a product specifically labeled as safe for it. Test the cleaner on a small, hidden area and check for changes in color, shine, or texture before using it more broadly. SmartStop’s bathroom cleaning guidance recommends matching tools to the surface to help prevent damage.
Keep separate tools for the toilet and organize supplies in a caddy
Set aside a toilet brush and cloths for toilet cleaning, and don’t use them on the sink, countertop, or other surfaces. This simple separation helps limit the spread of germs and residue. Put used reusable cloths straight into the laundry, away from clean supplies.
A caddy or small bin makes it easier to carry products and tools around the bathroom. Group supplies by task, and keep products in their original labeled containers so directions and safety information stay close at hand. Neat House. Sweet Home offers practical tips for organizing cleaning supplies, including storing brushes and other tools in bins. Keep the caddy and all cleaning products out of reach of children and pets, and follow each product’s storage instructions.
Use natural cleaners carefully: diluted vinegar may work on some glass, but not on stone or other acid-sensitive surfaces
Vinegar is sometimes used on glass, but it isn’t suitable for every bathroom surface. Even diluted vinegar can damage some natural stone and other acid-sensitive materials, and it may affect certain finishes. Check the manufacturer’s care instructions before using it, and test a small, hidden area first. For mirrors and shower glass, a glass cleaner labeled for the surface is a reliable alternative.
Never mix vinegar with other cleaning products, especially bleach. Mixing cleaners can release harmful gases. SmartStop’s advice on bathroom surface care discusses vinegar for some surfaces, but recommendations can vary by material and product. When in doubt, follow the surface manufacturer’s guidance and use a cleaner labeled as compatible.
Don’t rely on vinegar or baking soda to disinfect; use a labeled disinfectant when needed
Vinegar and baking soda may help with certain cleaning jobs, but they should not replace a disinfectant when disinfection is needed. Choose a disinfectant labeled for the surface you plan to treat, then follow its directions. Pay close attention to contact time, which is how long the surface needs to remain wet for the product to work as directed.
Check whether the label calls for rinsing, and wear any protective equipment it specifies. Never mix disinfectants with other cleaners. The CDC’s guidance on cleaning and disinfecting explains when disinfection may be appropriate and why it’s important to follow product instructions. Keep the bathroom ventilated while you work, and use the product only on surfaces listed on its label.
How Do You Prepare the Bathroom Safely?
A little preparation helps you clean more thoroughly while reducing the risk of slips, product exposure, or surface damage. Clear the room first, check the instructions on your cleaning products, and make sure you have a safe, well-ventilated space to work in.
Remove towels, bath mats, toiletries, and clutter; keep children and pets away
Take towels, bath mats, toiletries, wastebaskets, and other loose items out of the bathroom or move them to a dry spot. Clear counters and shower shelves so you can reach the full surface, including corners and edges. The OXO bathroom cleaning checklist also recommends removing items from counters and the shower before cleaning.
Keep children and pets out of the room while products are open or floors are wet. When you finish, return only clean, dry items. Wash towels and bath mats if they’ve picked up dust or cleaning residue.
Open a window or run the fan, and wear gloves and any protective gear listed on labels
Open a window or turn on the exhaust fan before using cleaning products. Wear gloves to protect your skin, and check each product label for any additional protective equipment, such as eye protection. Follow the directions for the specific cleaner you’re using. Lowe’s bathroom cleaning guidance recommends gloves and proper ventilation when cleaning.
Keep the fan running or the window open while you work, as the product label directs. If fumes become uncomfortable, stop, leave the room, and let it air out before continuing. Wash your hands after handling cleaning products, even if you wore gloves.
Follow label instructions for dilution, contact time, ventilation, and rinsing; never mix cleaners
Read the label before applying a cleaner. Check whether it needs to be diluted, how long it should remain on the surface, whether you need to rinse it, and what ventilation the product requires. Use the recommended contact time, and don’t leave the cleaner on longer than directed, since it may damage some finishes.
Never mix cleaning products, including bleach with ammonia or acidic cleaners. Mixing products can cause hazardous reactions. Follow Nationwide’s bathroom cleaning safety advice and use one product at a time. Rinse surfaces as directed before applying a different cleaner.
Test products in a hidden spot and avoid abrasives or unapproved acids on delicate finishes
Before using a new cleaner, test it on a small, inconspicuous area. Follow the label, then check for discoloration, dullness, or other changes before treating the rest of the surface. Take extra care with natural stone, coated fixtures, acrylic tubs, and other finishes that may have specific care requirements.
Choose a soft cloth or non-scratch sponge unless the surface instructions say otherwise. Avoid abrasive powders, rough pads, and acids that aren’t approved for the material. Vinegar, for example, can damage stone and other acid-sensitive surfaces. SmartStop’s bathroom cleaning advice recommends testing products in a hidden spot before use.
Clear walkways, keep electrical items away from water, and wipe up spills promptly
Clear the floor and doorway of laundry, cords, small bins, and anything else that could cause a trip. Move hair dryers, electric toothbrushes, and other electrical items away from sinks, tubs, and wet counters before cleaning nearby areas. Keep them in a dry place while you work.
Wipe up splashes and spills promptly to reduce the chance of slipping. Keep cleaning tools within reach, but not in the walking path. Before moving between areas, check that the floor is clear and dry. These simple precautions help keep the bathroom workspace safer as you clean.
What Is the Best Order for Deep Cleaning a Bathroom?
A top-to-bottom routine helps keep dust and dirty water from landing on surfaces you’ve already cleaned. Start with high surfaces, then clean the shower and tub, sink, and toilet. Finish with mirrors and the floor. Before using any product, check its label for suitable surfaces, contact time, and rinsing directions. Keep toilet tools separate from the cloths and brushes you use elsewhere.
Dust vents, lights, and other high surfaces first; work from top to bottom
Start by removing loose dust from vents, light fixtures, cabinet tops, and other high surfaces. Use a dry microfiber cloth or an extendable duster, and don’t spray cleaner directly onto lights or electrical fixtures. If you remove a vent cover, follow its care instructions and let it dry fully before replacing it. Use a stable step stool, and avoid reaching over a wet floor. Dust may fall onto the counter, tub, or floor as you work, so leave those areas for later. Cleaning from the top down means you can collect fallen dust as you clean each lower surface.
Apply suitable cleaner to the shower and tub, and follow the labeled contact time
Choose a cleaner approved for your shower or tub material, such as tile, acrylic, fiberglass, or natural stone. Apply it as directed, and check the label for how long it should remain on the surface and whether the area needs to stay wet. This waiting period, called contact time, helps the product work as intended. Leaving cleaner on longer does not necessarily improve results, and combining products can create hazardous fumes. The EPA’s guidance on disinfectant labels explains why it’s important to follow product directions, including contact time. If you’re unsure whether a cleaner suits a surface, test it in a small, hidden spot first.
Clean the shower and tub, then wipe nearby walls, fixtures, rods, and ledges
When the cleaner has sat for the time stated on its label, scrub the tub and shower with a non-scratch sponge or a brush suited to the surface. Use gentle pressure around grout and caulk to help protect them from damage. Rinse as directed, then wipe nearby walls, shower doors, fixtures, shelves, rods, and ledges. A clean microfiber cloth can help remove residue from many finishes, but check the care instructions for each material. If soap scum or mineral deposits remain, choose a compatible product instead of adding another cleaner on top. Rinse between products, and dry surfaces as needed to reduce streaks and water spots.
Clean the sink, countertop, and vanity with fresh tools
Set aside fresh cloths or sponges for the sink and vanity. Don’t reuse the tools you used in the shower, especially if you used them to clean the toilet. Choose a product approved for each surface, then clean the basin, faucet, handles, countertop, and backsplash. Pay extra attention to the areas around the faucet and drain, where soap, toothpaste, and water residue can collect. If you want to disinfect a compatible surface, use a product labeled for that purpose and follow its application and contact-time directions. The CDC’s cleaning and disinfection guidance explains when routine cleaning may be enough and when disinfection is appropriate. Only pour products down the drain if the label says they’re safe for that use.
Clean the toilet last with dedicated products and tools
Leave the toilet until after the shower and sink, and use a toilet brush and cloth reserved for it. Apply bowl cleaner according to its label, then scrub under the rim and around the waterline. Flush as directed. With a separate cloth and suitable cleaner, wipe the handle, tank, seat, lid, hinges, and base. Clean the floor around the toilet with a separate tool as well. If you disinfect, follow the product’s directions for the surface and contact time. When you’re finished, rinse the brush if appropriate, let it dry, and store it in its holder. Keep toilet tools away from clean cloths and other supplies, and wash your hands after cleaning.
Finish the mirrors and glass, then mop from the far corner toward the exit
Clean mirrors and any remaining glass with a suitable glass cleaner and a clean microfiber cloth. To keep spray away from frames, walls, and nearby fixtures, apply it to the cloth rather than directly to the mirror. Wipe in overlapping strokes, then use a dry section of cloth to remove streaks. Next, mop the floor with a cleaner made for its material. Start in the farthest corner and work toward the doorway so you don’t need to cross a wet area. Use only as much water as the floor can safely handle, especially on wood or laminate. Let the floor dry before replacing bath mats or walking across it.
How Do You Clean the Toilet, Shower, and Sink?
Clean from less soiled surfaces to more soiled ones, and keep toilet tools separate from cloths and brushes used elsewhere. Before using a cleaner, check that it’s suitable for the surface and follow the label’s directions for application, contact time, and rinsing. Work in a ventilated space, and never mix cleaning products.
Toilet: Apply bowl cleaner as directed, scrub under the rim, and wipe the seat, handle, base, and exterior with a separate cloth
Apply toilet bowl cleaner around the inside of the bowl, including beneath the rim. Leave it for the time stated on the label, then scrub with a toilet brush and flush. Some products need about 10 minutes to work, but the Nationwide bathroom-cleaning guide recommends following the cleaner’s instructions.
Use a separate cloth or disinfecting wipe on the seat, lid, flush handle, and outside of the toilet, including the base. Don’t use this cloth on the sink or counter. Clean the toilet brush according to its care instructions and let it air-dry before storing it. Keep toilet products and tools apart from supplies used on other surfaces.
Shower and tub: Match the cleaner and scrubber to the surface, gently remove soap scum, and rinse as directed
Check whether your shower or tub is made of tile, acrylic, fiberglass, stone, or another material, then choose a cleaner labeled as safe for that surface. Use a soft sponge or brush to loosen soap scum, paying attention to corners, shelves, and areas around fixtures. Avoid abrasive pads, which may scratch or dull some finishes.
For certain fiberglass or acrylic surfaces, a tub-and-tile cleaner may be suitable. The SmartStop bathroom-cleaning guide also describes a vinegar-and-dish-soap mixture for these materials. Check the manufacturer’s care instructions before trying a homemade solution, and test it in a hidden spot first. Rinse as directed, then wipe away remaining water to help prevent spots and residue.
Tile and grout: Use a compatible cleaner and grout brush; avoid scrubbing too hard
Choose a tile cleaner that suits the material, especially if your bathroom has natural stone. Acidic products, including vinegar, can damage some stone surfaces, so check the care instructions before cleaning. Apply the cleaner as directed, then gently work along the grout lines with a grout brush or soft-bristled brush.
Wipe or rinse the area according to the product label, and dry it with a clean cloth if needed. Scrubbing too hard can wear down grout or affect the tile finish. The SmartStop guide mentions a baking soda and vinegar mixture for grout, but this shouldn’t be treated as a disinfectant. When disinfection is needed, use a labeled product that’s compatible with the surface.
Sink and countertop: Remove residue, clean around faucets and drains, and disinfect compatible surfaces as directed
Move toiletries aside and wipe away loose debris before cleaning the sink and countertop. Apply a suitable cleaner to the basin, faucet, handles, and counter, then use a soft cloth or non-scratch sponge to remove toothpaste, soap, and water marks. Pay close attention to the faucet base and drain, where residue can collect.
If you need to disinfect, choose a product labeled for the countertop material and follow its directions, including the required contact time. Rinse if the label instructs you to, then dry with a clean cloth. Avoid vinegar and other acidic cleaners on stone unless the manufacturer confirms they’re safe. For the drain, follow the sink’s care guidance instead of pouring in products that may damage pipes or finishes.
Mirrors and glass: Use glass cleaner and a clean microfiber cloth to prevent streaks
Apply glass cleaner to a clean microfiber cloth rather than spraying it directly onto the mirror, particularly near the edges. Wipe from top to bottom, then buff the surface with a dry section of the cloth. For shower glass, first remove soap residue with a product approved for the surface, then rinse as directed before drying.
The Nationwide bathroom-cleaning guide recommends glass cleaner or a vinegar-and-water mixture with a microfiber cloth. Before using a homemade solution, check the care instructions for the glass and nearby finishes. Overspray can reach stone, metal, or other sensitive materials. Keep cleaner away from outlets and electrical fixtures, and ventilate the room while you work.
Which Bathroom Areas Are Easy to Miss?
A bathroom can look clean while dust, splashes, and residue linger in less obvious places. As you work, check these details and choose products and tools that suit each surface. A few extra minutes here can make a deep clean feel more complete.
Wipe baseboards, door frames, cabinet fronts, vanity sides, and spots behind movable items
Dust and splashes often collect along baseboards, door frames, cabinet fronts, and vanity sides. Wipe them with a microfiber cloth and a cleaner approved for the finish. Move portable items, such as the trash can or bath scale, so you can clean behind and beneath them. For tight gaps, use a soft brush or a cloth wrapped around your fingers. Avoid soaking wood or painted surfaces, since excess moisture can damage them. These spots are easy to overlook during a quick tidy, but they make a noticeable difference during a deep clean. Nationwide’s bathroom cleaning guide also highlights doors, frames, and vanity sides as areas worth checking.
Clean handles, switches, and other frequently touched surfaces with a compatible disinfectant
Faucet handles, cabinet pulls, light switches, and door handles get frequent use. First remove visible dirt with a cleaner that is safe for the surface. If disinfection is needed, choose a product labeled for that material and follow its directions for application and contact time. Keep liquid away from electrical switches. If the product label allows it, apply cleaner to a cloth rather than spraying the surface directly. Use a separate cloth from the one used around the toilet. The CDC’s cleaning and disinfecting guidance explains when disinfecting may be appropriate and why following product directions matters.
Carefully dust vents, lights, and cabinet tops; never spray electrical fixtures
Dust settles on exhaust vents, light fixtures, and cabinet tops, even when these areas are out of sight. Use a dry microfiber cloth or soft duster to collect it before cleaning lower surfaces. Check the manufacturer’s instructions before removing a vent cover or using moisture on it. Keep liquids away from electrical fixtures, and never spray cleaner directly onto a light, switch, or outlet. If a fixture needs more than dusting, turn it off and follow its care instructions. Nationwide’s bathroom deep-cleaning advice recommends dusting high surfaces while keeping sprays away from electrical components.
Check shower corners, grout edges, rods, drains, and the toilet base
Soap residue and moisture can collect in shower corners, along grout lines, around fixtures, and on the curtain rod. Use a cleaner that is safe for the surface, leave it on only for the time stated on the label, then gently scrub with a suitable brush. Rinse if the directions call for it. Avoid vinegar and other acidic cleaners on natural stone or acid-sensitive finishes. Clear visible hair and debris from the drain, and wipe around the toilet base with a dedicated cloth. For acrylic or fiberglass, SmartStop’s bathroom cleaning guide recommends a surface-appropriate cleaner and a soft-bristled brush.
Empty and wipe drawers or cabinets as needed, then return clean, dry items
Drawers and cabinets can collect dust, hair, product residue, and small spills. Empty one section at a time to keep items organized, then wipe the interior with a cloth and a cleaner approved for the material. Use a lightly damp cloth instead of saturating the surface, and dry the area before putting items back. Check bottles for leaks or sticky residue, and return only clean, dry items. You don’t need to empty every cabinet during each deep clean. Focus on visible buildup, or add one drawer to your regular cleaning rotation. Nationwide’s bathroom cleaning checklist recommends cleaning inside drawers and cabinets from time to time.
Wash reusable cloths and brushes, and let the toilet brush dry before storing it
Keep toilet tools separate from cloths and brushes used on the sink, counters, and other surfaces. Wash reusable cloths according to their care labels, and clean brushes using a method suited to their material. After scrubbing the toilet, rinse the brush and let it air-dry before returning it to its holder. Clean the holder regularly, too. If you use disposable wipes, follow the package directions and don’t flush them unless the label specifically says they are safe to flush. Clean, dry tools help prevent grime from spreading between surfaces and are ready for your next cleaning session.
How Can You Finish Efficiently Without Damaging Surfaces?
Follow contact-time and rinsing instructions instead of leaving cleaners on longer
Leaving a cleaner on a surface longer than directed doesn’t make it work better. It may damage the finish, while rinsing too soon can keep it from working as intended. Check the label for the amount to use, how long to leave it, and whether to rinse the surface afterward.
Work on one area at a time, and set a timer if a product needs a specific contact time. Don’t let cleaner dry on a surface unless the label says to. Following the product’s directions helps you clean thoroughly while protecting bathroom materials.
Use soft cloths and nonabrasive tools on delicate finishes; follow care instructions
Match your cleaning tools to the surface. A soft microfiber cloth is a good choice for many fixtures and finished surfaces, while a non-scratch sponge can help remove everyday grime. Avoid steel wool, rough pads, and stiff brushes on delicate finishes because they can leave scratches.
Before using a new cleaner or tool, check the care instructions for materials such as natural stone, acrylic, and specialty metal finishes. If you’re unsure whether a product is suitable, test it on a small, hidden area first. Following surface-specific care advice helps you remove residue without wearing down the finish.
Keep toilet tools separate from tools for sinks, counters, and other surfaces
Use a dedicated brush for the toilet and separate cloths for the toilet, sink, and countertop. This helps prevent germs and residue from spreading between surfaces. If you use reusable cloths, keep them separate by task and wash them after cleaning.
After scrubbing the toilet, rinse the brush as directed and let it dry completely before storing it. Keep toilet tools away from clean cloths and other supplies. These simple habits make your routine more hygienic. Bathroom-cleaning guidance also recommends keeping toilet towels and tools separate to help prevent cross-contamination.
Dry fixtures and floors as needed, check for residue, and replace clean towels and bath mats
After rinsing, check faucets, handles, glass, and other fixtures for water spots or cleaner residue. Wipe them with a clean, soft cloth if the surface allows. Dry any water on the floor, especially near the tub, shower, or sink, and keep the area clear until it’s safe to walk on.
If a surface looks streaky or feels sticky, check the product label and rinse or wipe it again as directed. Finish by putting out clean towels and a fresh bath mat. Taking a moment to dry and inspect the room helps leave it ready to use. A final check for moisture and residue can also help prevent water spots.
Get professional help with heavy buildup or regular cleaning
If grime has built up over time, avoid reaching for a harsher cleaner or rougher tool without checking the surface-care instructions. The wrong approach can damage finishes and make the next clean more difficult. For stubborn buildup, a professional cleaner can assess the surfaces and choose suitable products and methods.
Regular cleaning can also help keep a bathroom manageable, particularly in a busy household or during a move when time is limited. Consider arranging professional help if you need a thorough reset or ongoing visits. Bathroom-cleaning guidance from Nationwide recommends considering professional support for heavy buildup or when someone in the household is ill.
How Often Should You Deep Clean a Bathroom?
Start with every one to two weeks, then adjust for bathroom use and household needs
For many households, a deep clean every one to two weeks is a useful starting point. This gives you a regular chance to clean the shower or tub, toilet, sink, and floor before grime becomes harder to remove. Nationwide recommends cleaning the bathroom on this schedule, including wiping the shower, sweeping the floor, and disinfecting countertops.
Your ideal routine depends on how many people use the bathroom and how often. A bathroom shared by a busy household may need more frequent attention than a guest bathroom used occasionally. Check for visible residue, odors, or buildup between scheduled cleans, and address problem areas as they appear. If you’d rather leave the routine to a professional, a regular cleaning service can help keep your bathroom on schedule.
Clean more often when buildup, excess moisture, or illness calls for it
Some bathrooms need a deeper clean more often than every week or two. Daily showers can leave soap scum and water marks, while damp conditions may allow moisture to linger around grout, corners, and other surfaces. If you notice buildup returning quickly, adjust your schedule and clean those areas more often.
Illness is another reason to pay closer attention. Nationwide’s bathroom cleaning guidance recommends disinfecting more often than once a week when someone in the household is sick. Focus on frequently touched surfaces, such as faucet handles, light switches, and the toilet handle. Follow the product label for contact time, ventilation, and rinsing. A flexible routine helps you respond to how your bathroom is actually used.
Wipe wet surfaces and clean spills between deep cleans to make the next session easier
A few quick habits can keep the bathroom fresher between deep cleans. Wipe water from the sink and counter, squeegee shower walls after use, and dry puddles on the floor. Clean spills and visible residue when you notice them, rather than letting them sit until your next full bathroom clean.
Keeping surfaces dry can also help reduce lingering moisture. SmartStop’s bathroom cleaning guide recommends drying the bathroom to help prevent mold and mildew. Hang towels so they can dry fully, and run the exhaust fan during and after showers if you have one. These small steps won’t replace a deep clean, but they can make the next session quicker and easier.
Related Articles
- Cleaning Tips & Insights | Crystal Clean Collective LLC
- Crystal Clean Collective LLC | Professional Home & Office Cleaning Services
Frequently Asked Questions
How long does it take to deep clean a bathroom? The time depends on the bathroom’s size, how much buildup it has, and how many surfaces need attention. Gather supplies first, clear the room, and work from high surfaces down to the floor to keep the process organized.
Can I use one cleaner on every bathroom surface? Not always. Tile, grout, natural stone, acrylic, glass, and metal can have different care needs. Check the surface instructions and cleaner label, and test unfamiliar products in a hidden spot first.
Is vinegar safe to use in the bathroom? Vinegar may be suitable for some glass, but it can damage natural stone and other acid-sensitive materials. Check the manufacturer’s guidance, and never mix vinegar with bleach or other cleaners.
When should I use a disinfectant? Use a disinfectant when disinfection is needed, such as when someone at home is sick. Choose one labeled for the surface, follow its contact-time and rinsing directions, and don’t mix it with other products.
Should I hire a professional to deep clean my bathroom before moving? Professional cleaning can help when you’re short on time, facing heavy buildup, or preparing a home for a move. A vetted cleaning service can handle the detailed work and help leave the bathroom ready for its next use.