How to Clean Kitchen Cabinets Safely
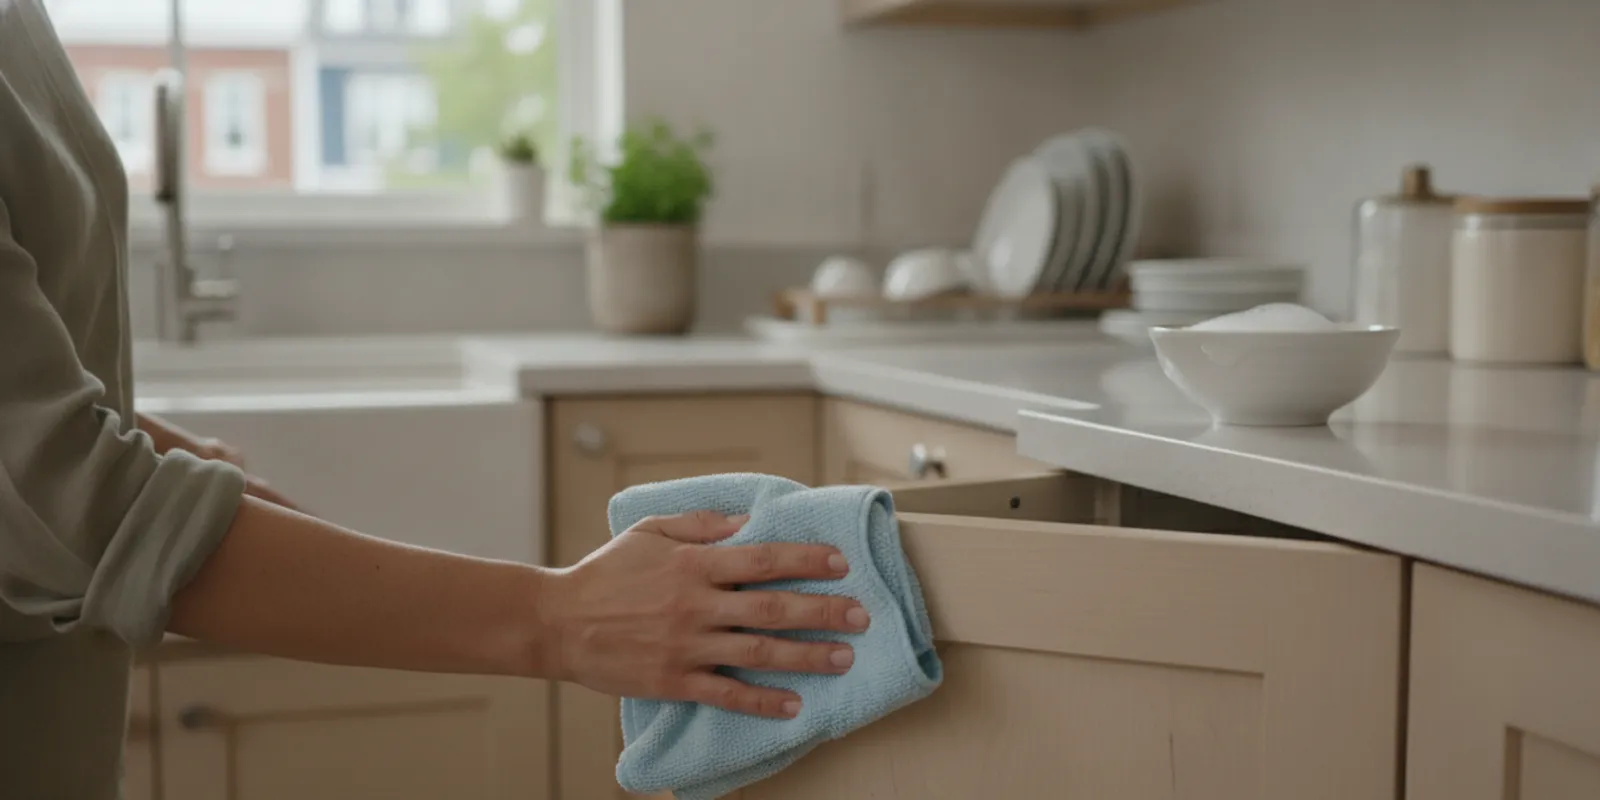
Kitchen cabinets collect cooking residue, fingerprints, dust, and spills, but a strong cleaner or rough scrubber can damage the finish. If you are learning how to clean kitchen cabinets, start with the gentlest method, test it in a hidden spot, and adjust for the cabinet material. A careful routine removes everyday grime without turning a small cleaning job into a finish repair.
Why do kitchen cabinets need a finish-safe approach?
Cabinet fronts look sturdy, but their visible surfaces are often a coating over wood, engineered board, laminate, or another substrate. The coating may be painted, stained, sealed, or factory-applied. Water and cleaning products interact with those surfaces differently. A method that works on a sealed, painted door could dull a delicate finish or seep into an unsealed edge. Even two doors that look alike may have different materials or coatings if one was replaced or refinished.
Grease adds another complication. Cooking oils mix with airborne dust and settle near the stove, above handles, and along upper cabinet edges. Wiping only the obvious smudges can leave a tacky film behind. On the other hand, soaking a door or scrubbing aggressively to remove that film can cause swelling, discoloration, scratches, or a dull patch. A cabinet face may also have a textured profile, narrow seams, or an exposed edge where moisture can collect.
A safe approach has four parts:
- Identify what you can about the cabinet surface and its care instructions.
- Remove dry dust before applying liquid.
- Use a mild solution and a soft cloth, with very little water.
- Dry the surface promptly and stop if the finish changes or the residue does not respond.
Do not assume that every cabinet in one kitchen has the same finish. Doors, drawer fronts, trim, and replacement panels can differ. When the material is uncertain, treat it as sensitive and test first. The goal is not to make every cabinet wet or to apply a polish. It is to remove soil with the least moisture and friction that will work.
What should you gather before you start?
Keep the toolkit simple. For most routine cleaning, you need a clean microfiber cloth or another soft, lint-free cloth, a small basin of warm water, and a small amount of mild dish soap. Keep a second cloth for rinsing and a dry cloth for drying. A soft brush can help with narrow details, but it should not have stiff or abrasive bristles. Separate cloths help avoid carrying greasy residue from one door to another.
- Soft microfiber or cotton cloths, with separate cloths for washing, rinsing, and drying.
- A small bowl or basin rather than a spray bottle that could overspray nearby surfaces.
- Mild dish soap for a diluted cleaning solution.
- A soft-bristled brush or clean, soft toothbrush for crevices, used gently.
- A stable step stool if you need to reach upper doors safely.
- A towel to protect the counter and catch drips.
- A small container for screws if you choose to remove hardware, plus a label to keep pieces organized.
Avoid steel wool, scouring pads, abrasive powders, hard scrub brushes, and razor blades. Do not reach for bleach, ammonia, oven cleaner, or concentrated degreaser unless the cabinet maker explicitly says that product is suitable. Also avoid combining cleaning chemicals. Mixing products can create hazardous fumes, and it is unnecessary for routine cabinet care. A melamine cleaning sponge can also be abrasive on some finishes, so do not treat it as a universal soft cloth.
Read the cabinet manufacturer’s care directions if you have them. Follow those directions over a general cleaning method. If a product is recommended, check its label and test it in an inconspicuous area. Never use a cleaner simply because it is described as natural or safe for another surface; those labels do not establish compatibility with your cabinet finish. Keep children and pets away from the basin and products while you work, and store the products as directed afterward.
How should you inspect the cabinets first?
Look closely before wet cleaning. Check for peeling, cracked coating, lifted veneer, swollen edges, loose trim, exposed wood, or existing stains. Note areas where the finish already looks cloudy or worn. Cleaning cannot repair that damage, and extra rubbing may make it more visible. Pay particular attention to lower edges, the corners by the sink, and the area near a cooktop, where spills, heat, or frequent contact may have affected the surface.
Check the care information, if available, and identify the likely surface. You might have painted wood, stained and sealed wood, laminate, thermofoil, or a combination of materials. If you cannot identify it, do not guess by using a strong product. Begin with a dry cloth, then test a barely damp cloth with mild soapy water in a hidden area such as the inside edge of a door. Pick a spot with the same finish as the area you plan to clean; a test on an interior surface may not predict how a different exterior coating responds.
To test, lightly wipe a small spot, then dry it. Wait until it is completely dry and look for color transfer, tackiness, clouding, swelling, or a change in sheen. Compare the test patch with the surrounding area in good light. If anything changes, stop and consult the manufacturer or a qualified cabinet professional. A test is not a guarantee for every part of the kitchen, but it can reveal an obvious compatibility problem before you clean a prominent door.
Remove objects from the counter below the cabinets. Put a towel under the work area, especially near seams and edges. If you plan to clean hardware, remove it only if you are comfortable reinstalling it and can keep screws organized. In most routine cleaning, you can clean handles in place without taking doors apart. Also decide where to start and where to set clean cloths, so you do not place them on a greasy counter or floor midway through the job.
What is the safest routine method?
For ordinary dust, fingerprints, and light food splashes, work in small sections. The aim is to lift residue with a damp cloth, not flood the cabinet or polish it with force. Cleaning one door at a time makes it easier to notice a reaction, rinse away soap, and dry the whole surface before water reaches a joint.
- Dust first. Wipe the surface with a clean, dry microfiber cloth. Dust can scratch a finish when dragged around under a wet cloth. If a door has deep grooves, loosen loose debris with a soft brush and collect it with the cloth rather than pushing it into the corners.
- Mix a mild solution. Add a small amount of mild dish soap to warm water. The water should feel slightly soapy, not thick or slippery. Start with less soap; excess can leave a film. There is no need to make a large bucket of solution if you are cleaning only a few fronts.
- Wring out the cloth. Dip a soft cloth, then wring it thoroughly. It should be damp, not dripping. Do not spray cleaner directly onto the cabinet. If the cloth feels wet enough to leave visible drops or a trail, wring it again before touching the door.
- Wipe gently. Move with the grain on wood where visible, or use light, even strokes on other surfaces. Clean one manageable section at a time. Avoid bearing down on an isolated mark; even pressure across the panel is less likely to make one polished or dull spot.
- Rinse away residue. Use a second cloth dampened with clean water and well wrung out. This helps prevent soap buildup. Rinse or replace the cloth when it begins to feel slick, so you are not redistributing soap.
- Dry immediately. Use a soft, dry cloth, paying attention to edges, seams, corners, and the area around hardware. Look at the door from the side to catch droplets that are easy to miss when looking straight on.
Do not leave wet cloths on doors, let water pool around joints, or allow liquid to run down the cabinet. Avoid scrubbing in circles with pressure. If a mark remains after a few gentle passes, pause and reassess rather than increasing force. A stubborn mark may be embedded grease, a stain, or a change in the finish rather than removable surface dirt. If you need to take a break, leave the cabinet dry rather than keeping a damp cloth against it.
For a whole kitchen, use a top-to-bottom plan. Clean upper cabinet fronts first, then lower fronts, and work from cleaner areas toward visibly greasier ones. Change the wash water when it becomes cloudy or greasy. A dirty cloth can spread oily residue over doors that were already clean. You can clean a small group of neighboring doors, rinse and dry those, then move to the next group. That is more controlled than wetting the entire kitchen and trying to catch up with drying.
How can you plan a whole-kitchen cabinet clean?
A simple plan helps keep the work orderly and reduces repeat wiping. Before starting, scan the kitchen and note high-touch, high-grease, and low-use areas. High-touch areas include pulls, the door beside the refrigerator, and the cabinet where cups or snacks are stored. Grease-prone areas tend to be near cooking, while a cabinet at the far end of the room may need only dusting. The visible condition should guide the method; the same full wet-cleaning routine is not necessary for every front.
- Clear a work zone. Move countertop items out of the way where possible, and cover or remove anything that could be splashed. Do not place cleaners on a food-preparation surface where they could be confused with food or drink.
- Work in a manageable direction. Start at one end of the upper cabinets and move across, then repeat for lower cabinets. This makes it easier to remember which surfaces have been washed, rinsed, and dried.
- Separate clean and dirty materials. Reserve one cloth for applying solution, another for rinsing, and a dry cloth for finishing. If a cloth picks up visible grease, fold to a clean side or switch cloths rather than spreading soil.
- Pause at transitions. Where a cabinet meets glass, metal, a countertop, or an appliance, clean each material according to its own care directions. Keep liquid out of seams and avoid letting one cleaner migrate onto another surface.
- Check your work in good light. After drying, look for remaining haze, streaks, or sticky spots. If a light mark remains, consider whether it is residue or a defect before repeating a gentle pass.
For a small kitchen with light soil, a focused session on handles and the doors around the cooking area may be all that is needed. For a larger kitchen, break the job into zones rather than stretching one bucket of dirty water across the room. For example, you might clean the cooking wall, change the water and cloth, then handle the pantry and island. This is not a requirement to wet-clean cabinets on a schedule; it is a way to keep the cleaning controlled when you decide that the whole set needs attention.
Build in a final dry check. Run a clean finger lightly over a fully dry, inconspicuous section only if the surface is sound; a tacky feel can signal residue or a finish problem. Inspect edges and the bottom of doors for drops. Return countertop items only after nearby surfaces are dry, and put products away safely. A few minutes of checking can prevent a soap film from being mistaken for permanent dullness.
How do you remove grease without harming the finish?
Grease usually builds up where cooking vapors travel and where hands repeatedly touch the surface. Pay attention to cabinet doors beside the range, the underside of cabinets near the cooktop, the area above the range, and the edges around pulls. Start with the mild soapy solution, since many light grease films respond to a little soap and careful wiping. Do not assume a greasy-looking patch is ordinary dirt; heat and cooking can change a coating as well.
Hold the damp cloth against a greasy spot briefly to soften the residue, then wipe gently. Do not soak the door or leave the wet cloth in place for an extended period. Rinse the cloth often, refresh the solution as needed, and dry the area after cleaning. Several gentle passes are safer than one forceful scrub. If the film lifts onto the cloth, switch to a clean portion so the loosened oil does not smear into the next section.
A helpful sequence is to begin with a small patch near the edge of the grease, not the most visible center. Apply a lightly soapy, well-wrung cloth, let it rest only briefly, then wipe without pressure. Rinse with a separate cloth and dry. Inspect after it is dry. If the patch looks unchanged, do not increase soap concentration repeatedly or try several products one after another. Check the maker’s guidance and verify that the problem is removable buildup before proceeding.
If the film persists, check the cabinet care guide for a suitable degreasing product. Test the product in a hidden spot and use it only as directed. Do not assume a kitchen degreaser is safe for painted, stained, lacquered, or foil-wrapped cabinets. Strong products can strip or soften coatings, alter gloss, or leave uneven patches. Use a product only if both the cabinet care instructions and its label are consistent with that use.
Grease that has hardened over a long period may not come off safely with a household wipe. If a gentle cleaner does not work, stop before trying solvents, abrasive pads, or concentrated chemicals. A cabinet maker or finish specialist can advise whether the residue can be removed without refinishing. If your goal is a full kitchen reset, a professional deep cleaning service can address suitable surfaces as part of a broader cleaning visit, but it should not be presented as a way to repair damaged coatings.
How should you clean different cabinet materials?
When you know the material, use the manufacturer’s directions. The following guidance is a conservative starting point, not a replacement for specific care instructions. Every finish can vary in age, quality, and condition. A household may have several materials in one kitchen, so identify the surface by door or section rather than relying on a single label for the room.
Painted cabinets
Painted fronts can show scuffs, wear, and changes in sheen. Use a soft, well-wrung cloth and mild soap solution, then rinse lightly and dry. Avoid abrasive tools, strong solvents, and repeated rubbing on one small spot. If paint is chipped, peeling, or soft, avoid wet cleaning that area and seek advice before proceeding. A painted finish can look clean while still being vulnerable at a chip or along a worn edge, so keep the cloth away from exposed material.
For fingerprints near a pull, first try a dry cloth. If the mark remains and the finish is sound, use a barely damp soapy cloth with a light touch, then rinse and dry. If rubbing causes the paint to look shinier or duller, stop. Do not try to blend that area by expanding the cleaning patch; the change may be in the paint rather than a residue that can be removed.
Stained or sealed wood
Dust with a soft cloth and, when needed, wipe with a barely damp cloth. If the care instructions permit soap and water, use a diluted solution and work with the wood grain. Dry promptly, especially along joints and edges. Do not apply furniture polish, wax, or oil unless the cabinet maker recommends it; those products can build up or affect later refinishing.
Natural variations in grain and stain can make a door look uneven even when clean. Avoid trying to erase a darker patch with pressure. First consider whether it is a spill, a change in stain, or a shadow in the wood pattern. Clean only the surface soil that responds to the mild method, and seek finish-specific guidance if the mark remains.
Laminate
Laminate surfaces are commonly cleaned with a soft cloth and mild detergent, subject to the maker’s directions. Keep water away from seams and edges, where moisture could reach the underlying material. Avoid abrasive powders and pads that can scratch or dull the surface. Do not use high heat or a steam cleaner unless the manufacturer specifically permits it. A smooth, nonporous-looking face does not mean that the joints can be soaked safely.
When wiping, move across the face with a damp—not dripping—cloth. If the laminate has a textured pattern, a soft brush can help lift dust from shallow ridges. Brush lightly and wipe the loosened debris away. Do not use a sharp point to pick at a seam or chipped edge, as that may enlarge the damage.
Thermofoil or wrapped fronts
Wrapped cabinet fronts may have seams or edges that are vulnerable to heat, moisture, and aggressive chemicals. Use a soft cloth, minimal moisture, and a quick dry. Do not direct steam or hot air at the surface, and stop if a corner is lifting or the covering looks loose. A professional can help distinguish removable grime from a problem with the wrap itself. Avoid pulling or pressing on a loose section while cleaning; the issue calls for assessment, not more friction.
Glass inserts and mixed materials
Cabinet doors sometimes combine wood or painted frames with glass, metal, or decorative inserts. Avoid letting glass cleaner run onto the frame or into joints. Apply an appropriate glass product to a cloth rather than spraying the door, and follow the instructions for each material. If you are unsure, use separate cloths and keep liquids away from the seams. Start with the frame if it needs only dusting, and treat the insert separately to keep cleaner from sitting on the surrounding finish.
How do you clean cabinet handles and hardware?
Handles, knobs, and pulls collect skin oils and food residue. Their finish may be different from the cabinet surface, so treat them as a separate material. Wipe them with a soft cloth lightly dampened with mild soapy water, then wipe with a clean damp cloth and dry thoroughly. Do not let liquid remain around the base plate or run behind a handle, where it can reach the door’s finish or a screw opening.
Use a soft brush to reach around the base of a pull or inside a simple groove. Work gently and avoid forcing liquid into screw holes or the gap between hardware and door. Do not use metal polish, vinegar, bleach, or abrasive cleaners unless the hardware manufacturer confirms compatibility. Plated finishes can discolor or wear, and some dark or brushed finishes are intended to retain a particular appearance. A cloth that looks clean on a cabinet door can carry grit that scratches a metal finish, so use a clean section.
If you remove hardware for a more detailed clean, place each piece and its screws in a labeled container. Keep track of which door it came from, especially if handles differ. Dry the parts completely before reinstalling. Do not overtighten screws; too much force can damage the door or strip the hole. If a screw is stuck or a handle is loose because the door material is damaged, do not force it during a cleaning task.
Consider cleaning hardware in small groups rather than removing every pull at once. Complete one section, reinstall and check it, then move on. This limits the chance of mixing pieces or leaving a door without a handle. If you do not need to take the hardware off to remove the soil, leave it in place and wipe around the mounting points with a damp cloth that is thoroughly wrung out.
How should you handle grooves, corners, and cabinet tops?
Dust and crumbs collect in routed details, around hinges, and where cabinet faces meet trim. Start with a dry, soft brush or cloth to loosen debris. Use a soft-bristled brush for a narrow groove, then wipe away the dust. If the area needs damp cleaning, use a barely damp cloth or brush and dry it right away. Avoid pushing wet debris deeper into a joint, and do not use cotton swabs or pointed tools in a way that leaves fibers or scrapes the finish.
For the top of upper cabinets, first check how much dust or grease is present and whether the surface is safe to reach. Use a stable step stool rather than standing on a chair or counter. Clear loose dust carefully so it does not fall onto the cooking area, then clean with a damp cloth only if the finish and access make that appropriate. Avoid reaching too far or leaning over a hot stove. If the surface is inaccessible or heavily soiled, leave it to someone with the right equipment and safe access.
Cabinet tops can have a different finish from the doors, or may be hidden and unfinished. Do not assume a wet cloth is appropriate simply because the area cannot be seen. If loose dust is the only issue, dry dusting may be sufficient. If oily buildup is present and the surface is unsealed or uncertain, a stronger cleaner is not a safe shortcut. Get material-specific advice rather than saturating a surface you cannot inspect closely.
Do not use a sharp tool to dig residue out of seams. It can cut the finish or damage an edge. A few careful brush strokes are preferable; if buildup is hard and fixed, get material-specific advice. For hinges, wipe exposed surfaces with a soft cloth and avoid forcing cleaner into the moving parts. If a hinge squeaks or looks corroded, that is a hardware maintenance issue, not something to solve with extra cleaning product.
What common mistakes should you avoid?
- Using too much water. Liquid can seep into joints, edges, and damaged coatings. Wring the cloth well and dry each section.
- Starting with a strong degreaser. A powerful product may damage a finish before you know what it is. Begin with the mildest method that fits the care instructions.
- Scrubbing harder when a mark remains. Pressure can create a shiny or dull patch. Pause and identify whether the mark is removable soil or finish damage.
- Cleaning without dusting. Loose grit can scratch during wiping. Remove dry debris first.
- Spraying directly onto the door. Overspray can enter seams or reach a surface that should not get wet. Apply solution to the cloth instead.
- Leaving soap behind. Residue can attract dirt and make a door feel tacky. Wipe with a clean damp cloth and dry.
- Using a cleaner meant for another surface. A product suitable for a countertop, oven, or floor may not be suitable for a cabinet coating.
- Ignoring existing damage. Peeling, swelling, or exposed substrate changes what is safe. Avoid wet cleaning the affected spot and seek advice.
- Mixing products. Never combine cleaning chemicals. Use one product at a time and follow its label.
- Leaving residue in a groove. A wet brush can move loosened soil into a corner. Use minimal moisture and wipe the area dry.
- Assuming a whole kitchen has one finish. Replacement doors, trim, or inserts may differ. Test and handle the surfaces separately.
These mistakes often begin with a reasonable goal—saving time or removing a stubborn spot—but add risk without improving the outcome. A useful rule is to change only one thing at a time. If the first attempt uses a mild solution and does not work, do not immediately add a new cleaner, more water, and more pressure together. You would not know what caused a reaction, and you could make the affected patch harder to assess.
How often should you clean kitchen cabinets?
There is no single schedule that fits every household. How quickly cabinets collect grime depends on how often you cook, the layout and ventilation, the number of people using the kitchen, and whether there are children or pets. A practical approach is to wipe fresh splashes when they happen, clean frequently touched areas as needed, and inspect the rest of the fronts periodically. The decision to clean should follow visible soil and the cabinet maker’s instructions, not a calendar that calls for unnecessary wet cleaning.
Regular light upkeep is generally easier on a finish than waiting for a thick layer of grease and then scrubbing hard. A short wipe around handles and near the cooking area can prevent residue from becoming stubborn. Dust less-used cabinet fronts when you notice buildup. Clean tops and detailed trim based on what you see and can reach safely, not because a rigid calendar says to use a wet cleaner. If only one area is dirty, it is reasonable to address only that area.
One way to make upkeep manageable is to attach it to another kitchen routine. After a cooking spill, wipe the cabinet only after the cooktop and surrounding surfaces are safe to approach, using a cloth compatible with the finish. During a general kitchen reset, glance at the handle areas and the fronts near the range. If they look clean, leave them alone. If a weekly wipe is too frequent for the household, adjust it; the surface condition matters more than following someone else’s schedule.
Adjust the routine when you change products or discover a finish that reacts poorly. If the cabinets are newly installed or recently refinished, follow the manufacturer’s curing and care directions before cleaning. Do not assume a newly finished surface is ready for soap, polish, or water. When you do not know when the finish was applied, ask the installer or refinisher before doing more than gentle dry dusting.
How should you troubleshoot a mark that will not come off?
When a spot remains after gentle cleaning, first let the surface dry completely. A wet or soapy patch can look different from the surrounding finish, so judging it immediately can lead to unnecessary repeated wiping. Once dry, view it in even light from more than one angle. Ask whether the patch is raised or sticky, whether it is a color change, and whether it appears only in the coating or might be a reflection from the grain.
If the spot feels like surface residue and the finish is sound, one more light pass with the approved mild solution may be reasonable. Use a clean cloth, a small area, and the same wash-rinse-dry sequence. If the spot does not improve after that, pause. Repeating the same action many times can wear the surface even when the cleaner is mild. Make a note of what product and method you used so that you can share accurate information if you ask for help.
If the mark is sticky but will not lift, it could be hardened food or grease, but it could also be a softened coating or a failing finish. Do not test it by scratching with a fingernail, blade, or card. If the cloth picks up cabinet color, if the surface feels gummy, or if a patch changes sheen, stop. If the spot is a stain within the wood or paint, household cleaning may not be the right remedy. A cabinet professional can advise about repair or refinishing when the concern is the surface itself.
Keep a short record when you are unsure: which door was tested, what the finish appears to be, the cleaner used, how long it contacted the surface, and what changed. This information is more useful than trying several unrecorded products. It can also help distinguish an isolated spill from a more general problem such as peeling coating or repeated moisture exposure.
What is the difference between routine care and a deep cleaning service?
Routine cabinet care is the small, regular work that keeps ordinary dust, fingerprints, and recent splashes under control. It usually means a light dusting, spot cleaning, and an occasional gentle wipe of cabinet fronts and hardware. It is limited to surfaces you can safely reach and clean with methods the finish allows. It is not cabinet restoration, refinishing, repair, or a promise that old stains will disappear.
A deep cleaning service is a more comprehensive cleaning visit, not a cabinet restoration or refinishing service. It may be appropriate when the kitchen needs attention across multiple areas, such as surfaces, floors, and other parts of the home, or when routine upkeep has been deferred. The exact work should be discussed in advance so that expectations and surfaces are clear. Crystal Clean Collective LLC provides home cleaning and deep cleaning services in the DMV with vetted, insured cleaners and simple online booking.
A professional visit may help with suitable, accessible surfaces, but the word “deep” does not mean every finish can be treated with strong chemicals, extra water, or abrasive tools. A cleaning provider should know about delicate materials, manufacturer restrictions, and existing damage before the visit. The safest plan is to identify the cabinet surfaces and agree on the scope in advance, especially when a visible buildup is close to an edge or a coating is already worn.
The distinction matters when grime is attached to a delicate or damaged finish. A cleaning visit can address removable soil on suitable surfaces; it cannot promise to fix peeling paint, swollen board, faded stain, scratches, or a failed coating. Tell the provider about unusual materials, prior damage, or manufacturer restrictions before the appointment. Ask what the visit includes and what areas need a specialist instead. The company's spotless guarantee is relevant to its cleaning service, but it should not be understood as a guarantee of cabinet repair or refinishing; confirm the appointment scope and service terms directly.
For details on arranging a home visit, see cleaning prices and booking. If the work is for an office or another workplace rather than a home, review the company’s commercial cleaning solutions to find the appropriate service information. A commercial clean and a household cabinet-care project are different contexts, so ask about the needs of your space rather than assuming one service scope fits both.
How can you prepare for professional cleaning?
If you want a cleaner to address the kitchen as part of a home cleaning or deep cleaning visit, preparing a few details helps establish realistic expectations. Start by identifying which cabinet areas concern you: for example, sticky pulls, a light grease film beside the range, dust on upper fronts, or residue on the cabinet tops. “Clean the cabinets” can mean anything from wiping a few reachable fronts to addressing extensive buildup, so name the exact surfaces you want discussed.
- Share what you know about the cabinet material or finish and provide care instructions if available.
- Point out peeling, swelling, chips, loose edges, discoloration, or any area that should not be wet-cleaned.
- Tell the provider which products have already been used and whether any caused a reaction.
- Clarify whether you mean cabinet fronts, hardware, interior shelves, tops, or only selected areas.
- Ask what the planned method is for a delicate or unknown finish and how the provider handles a surface that reacts unexpectedly.
- Move fragile or food items from nearby counters and make the work area accessible.
Do not ask a cleaner to take apart cabinet doors, remove built-in hardware, or use a finish-specific product unless that work has been discussed and is within the agreed scope. A cleaning visit should not become an improvised repair project. If you have a cabinet maker’s written instructions, share them before the appointment. If a particular spot needs a specialist, separating that repair from general cleaning can prevent confusion about the result.
To learn about home service and arrange a visit, use Crystal Clean Collective LLC’s home cleaning information or online booking page. The company serves the DMV region and describes its cleaners as vetted and insured. Confirm the service details that apply to your home, the expected areas of focus, and any terms relevant to the spotless guarantee when booking.
When should you stop and ask for help?
Stop cleaning if color transfers to the cloth, the surface becomes sticky, the sheen changes, the finish blisters, or an edge begins to lift. Also stop if a mild solution and gentle wiping do not remove the residue. More force or a stronger chemical could make the damage worse. If liquid has entered a seam, dry what you can without pressing moisture farther in, and monitor the area rather than repeatedly wiping it.
Contact the cabinet manufacturer or installer when you need material-specific instructions. A cabinet refinisher can assess worn coatings, stains, scratches, or peeling. If the concern is accumulated dirt on otherwise sound surfaces throughout the kitchen or home, a professional cleaning provider can clarify what a cleaning appointment can reasonably address. For general service questions, contact Crystal Clean Collective LLC and describe the surfaces and the condition you are seeing.
Share useful details: the cabinet age if known, material or finish, products already tried, and whether the surface is damaged. A photo may help the professional understand the issue, but it does not replace an in-person assessment when the finish is uncertain. If a finish change is sudden or localized, mention where it happened and what was used there. Clear details help the person advising you avoid recommending a generic method that may not suit the surface.
Frequently asked questions
Can I use vinegar to clean kitchen cabinets?
Do not assume vinegar is safe for your cabinets. Acidity can affect some coatings and finishes, and cabinet materials vary. Use the manufacturer’s directions; otherwise test a mild soap solution in a hidden place first. If that test changes the surface, stop rather than switching immediately to a different household ingredient.
Can I use a steam cleaner on cabinet doors?
Do not use steam unless the cabinet manufacturer explicitly approves it for the specific material and finish. Heat and moisture can harm coatings, seams, or wrapped edges. A soft cloth with minimal moisture is a safer general starting point. Steam is not a shortcut for stubborn grease when you do not know how the finish will respond.
How can I remove sticky grease from cabinet doors?
Try a soft cloth dampened with a mild dish-soap solution, using gentle passes and drying promptly. If the residue remains, check the maker’s care guidance before trying a degreaser. Avoid abrasive pads and strong chemicals that could strip or dull the finish. If the surface feels tacky even after the soil is gone, stop and consider whether the coating itself may be affected.
Can I clean cabinets with a multipurpose spray?
Only if the label and cabinet care instructions confirm that the product is suitable. Test it in a hidden spot and apply it to a cloth rather than spraying the door. A product intended for counters or appliances may not be compatible with a cabinet coating. If you cannot confirm compatibility, use the conservative mild method or ask the cabinet maker.
Does a deep cleaning service include cabinet refinishing?
No. Deep cleaning addresses suitable cleaning tasks; refinishing repairs or changes the cabinet surface and requires a different specialist. Confirm the visit scope before booking and mention any damaged or delicate finishes. A cleaning provider can clarify which removable soil is appropriate for the agreed service, but should not be expected to restore a failing finish.
Should I clean the inside of the cabinets too?
That depends on the visible soil, the cabinet material, and the manufacturer’s directions. Empty a shelf before cleaning it, dust crumbs first, and use minimal moisture only if the interior finish permits it. Dry the surface before replacing dishes or pantry goods. Do not assume that an unfinished interior can be cleaned with the same method as a sealed exterior door.
What should I do if the cabinets still look dull after cleaning?
Let them dry completely and compare the area in even light. A haze may be soap residue, but dullness can also indicate wear or a change in the finish. One careful rinse-and-dry pass may help if the surface is sound; repeated rubbing or applying polish can make matters worse. Stop and get finish-specific advice if the appearance does not improve.
With a gentle method, minimal moisture, and a small-area test, most routine cabinet cleaning can stay manageable while protecting the finish. When residue or damage does not respond safely, stop and get advice rather than risking the surface.