How to Clean Walls Safely Without Damaging Paint
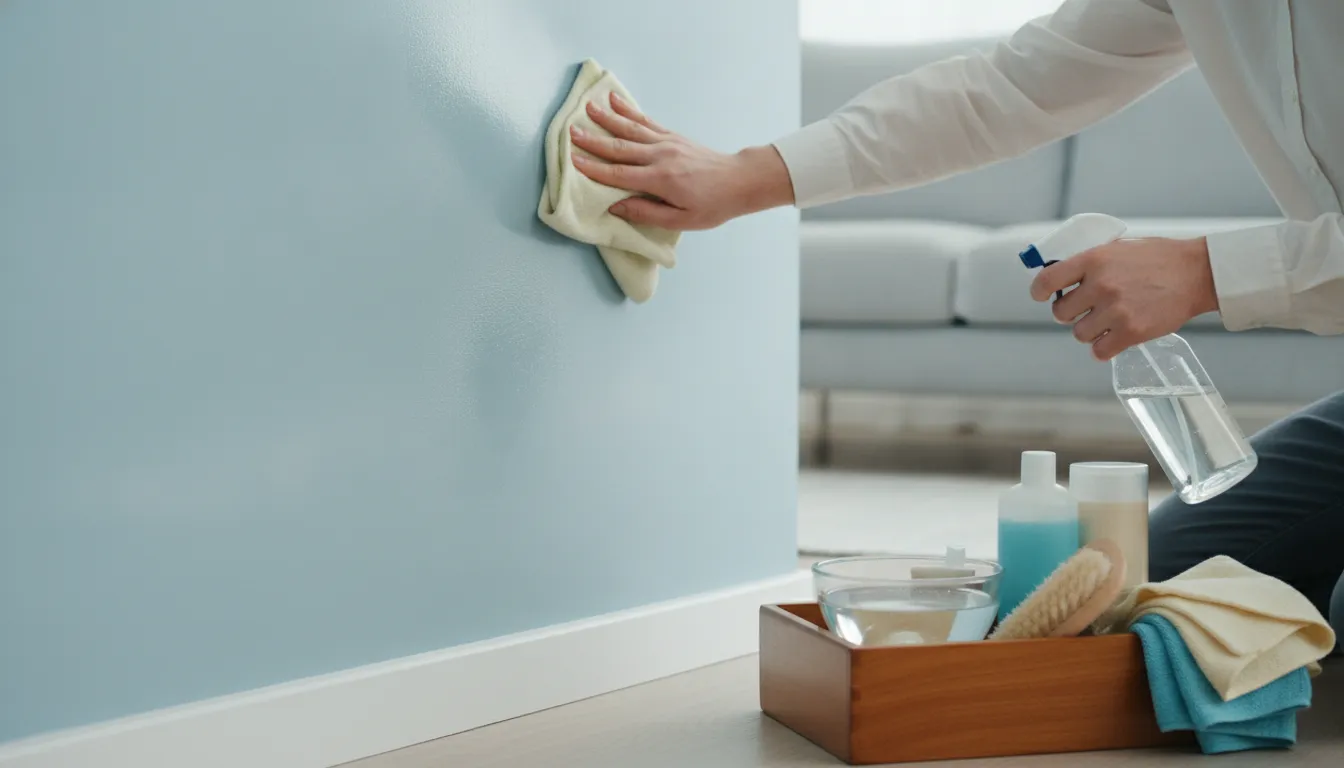
Walls collect more than dust. Hallways gather shoe marks, kitchens hold grease, and areas around switches and doorways often show fingerprints. During a move, furniture and boxes can hide these marks until the property is nearly empty. Knowing how to clean walls helps you handle these areas without scrubbing away the finish or spreading stains. A barely damp microfiber cloth, mild soap, clean rinse water, and careful drying are often enough for everyday buildup. More serious concerns, such as bubbling paint, mildew, or recurring water stains, need a different response. Here is how to prepare walls, treat common marks, avoid damage, and know when professional help makes sense.
Key Takeaways
- Prepare walls carefully: Identify the surface, test your cleaner in a hidden spot, remove dust, protect floors and nearby items, and improve airflow before washing.
- Clean with the gentlest suitable method: Use a barely damp microfiber cloth, mild soap, light pressure, and small sections to prevent streaks and protect paint, wallpaper, plaster, and wood.
- Hire professionals for complex jobs: Vetted, insured cleaners can handle high walls, delicate finishes, heavy stains, empty properties, move-in cleaning, and commercial spaces, backed by a spotless guarantee.
How Should You Prepare Walls for Cleaning?
Preparing walls before washing them helps prevent streaks, paint damage, and marks on nearby surfaces. It also makes cleaning easier, particularly when you are preparing a home for move-in or clearing a property after furniture and boxes have been removed.
Begin with a quick inspection. Identify the wall finish, look for signs of moisture or damage, and test your chosen cleaning solution in an inconspicuous area. Then gather your supplies, remove loose dust, and clear enough space to work safely. These steps are especially helpful when cleaning several rooms, since they reduce interruptions and help you avoid repeating work.
Use the gentlest method that suits the surface. Most painted walls do not need excessive water, vigorous scrubbing, or strong chemicals. A barely damp cloth and mild soap are often enough for everyday dirt. If the wall has wallpaper, textured plaster, wood paneling, or visible water damage, check its care requirements before applying any product.
Gather microfiber cloths, soft dusters, brush attachments, nonabrasive sponges, buckets, mild soap, and dry towels
Choose supplies that remove dirt without scratching paint or leaving lint behind. Gather microfiber cloths, a soft duster, a vacuum with a brush attachment, a clean white sponge, mild soap, two buckets, and several dry towels. A white sponge also makes it easier to see whether paint is transferring to the surface.
Use one bucket for washing and another for rinsing when cleaning a large area. Select a mild, paint-safe soap instead of a strong degreaser unless a specific stain requires it. The National Park Service recommends testing cleaning methods carefully on painted surfaces because moisture and friction can affect a finish.
Remove dust and cobwebs from top to bottom
Dust the walls before introducing moisture. Start at the ceiling line and work downward with a soft duster or vacuum brush attachment. Pay attention to corners, light fixtures, door frames, areas behind radiators, and the space above baseboards. Removing loose dust first prevents it from becoming muddy residue when it gets wet.
Use a long-handled duster or a stable step ladder for high areas. Avoid dragging a vacuum hose across the wall, as its fittings may leave scuffs. On textured surfaces, move the brush lightly over raised areas rather than pressing into them. Working from top to bottom lets falling dust land on sections you have not cleaned yet.
Clear the room and protect floors, furniture, outlets, trim, and nearby surfaces
Move furniture, boxes, and decorations away from the walls so you can work without bumping into anything. If a large item cannot be removed, pull it forward and cover it with a clean sheet or suitable protective covering. Place dry towels along the baseboards to catch drips, particularly near carpet, hardwood, and other moisture-sensitive flooring.
Protect outlets and switches from splashes, but never cover them with wet materials. Keep water away from trim, vents, frames, and unfinished wood. Clearing each room before a move-in or move-out clean creates a continuous working area and makes it easier to find marks that were hidden behind furniture.
Improve ventilation and use a stable step ladder without overreaching
Open a window or door to improve airflow while you clean, when conditions allow. Ventilation helps walls dry and reduces lingering odors from cleaning products. Keep fans from blowing directly at wet walls, since uneven drying can leave marks or spread moisture onto nearby surfaces.
Use a stable step ladder on a level, dry floor for high sections. Face the ladder, keep both feet on the recommended steps, and climb down to reposition it instead of leaning sideways. The Occupational Safety and Health Administration provides ladder safety guidance that applies when cleaning tall walls, stairwells, and commercial interiors.
Check for peeling paint, bubbling, cracks, mildew, and moisture damage
Inspect the walls in good light before applying cleaner. Look for peeling or flaking paint, bubbling, cracks, soft areas, mildew, and discolored patches. These signs can indicate leaks, condensation, or another moisture problem. Washing over damaged sections may loosen more paint or conceal an issue that needs repair.
Pause if you notice a damp smell, recurring water stain, or visible mold growth. Find and address the source of moisture before cleaning. Minor surface marks may need a different treatment from structural damage, while extensive mildew or peeling paint may require specialist assistance. Avoid disturbing questionable areas during a move until they have been assessed.
Identify the wall finish and test cleaners in a hidden spot
Different finishes tolerate moisture and friction differently. Flat and matte paint can mark easily, while eggshell, satin, semi-gloss, and gloss finishes generally tolerate gentle washing better. Wallpaper, plaster, wood paneling, brick, and tile also require specific methods. Check the paint can, lease information, or manufacturer’s care instructions if you are unsure.
Test the solution behind a door, near the floor, or in another hidden location. Apply a small amount with a clean cloth, let it dry, and check for color transfer, dullness, bubbling, or streaks. The US General Services Administration recommends testing cleaning products on a small, inconspicuous area before wider use.
Avoid soaking walls, direct sprays, abrasive tools, harsh chemicals, and mixed cleaners
Walls generally need less water than floors or countertops. Dampen a cloth or sponge until it is barely wet, then wring out the excess before touching the wall. Do not spray cleaner directly onto the surface, since liquid can run into seams, outlets, trim, and porous drywall or plaster.
Avoid steel wool, rough scrubbers, and abrasive powders, which can scratch paint and create shiny patches. Skip strong chemicals unless the wall material and stain require them. Never combine cleaning products, especially bleach and ammonia-based formulas, because the mixture can release dangerous fumes. The CDC explains safe cleaning practices, including following product labels and maintaining ventilation.
How Can You Clean Each Wall Surface Safely?
Walls need different cleaning methods based on their finish and material. Paint sheen, wallpaper coating, texture, and porosity all affect how much moisture and pressure a surface can handle. Before washing a full wall, identify the material and test your cleaning solution in a hidden spot. This can reveal fading, discoloration, water marks, or surface damage before it becomes more noticeable.
Begin with the gentlest method that can remove the dirt. Dry dusting should come before wet cleaning, and plain water should come before soap or stronger products. Use a clean microfiber cloth, wring it out well, and work in small sections. Avoid soaking walls, spraying products directly onto them, or using abrasive tools that may remove paint or damage the surface.
If you are cleaning before a move, allow extra time for spot testing and drying. Moving furniture can reveal scuffs, fingerprints, and dust that have collected behind it, but rushing may leave streaks or cause damage. Clean Mama’s wall-cleaning guide recommends using minimal moisture on delicate finishes and testing cleaning methods before applying them more widely.
Clean flat and matte paint with minimal moisture and light pressure
Flat and matte paint can absorb moisture easily and may not withstand much rubbing. Start by removing dust with a dry microfiber cloth, soft duster, or vacuum brush attachment. If a mark remains, dampen a clean cloth with water, wring it until nearly dry, and gently blot the spot.
Avoid scrubbing, repeated rubbing, and strong cleaning products. These can create shiny patches, remove pigment, or leave a lighter area on the wall. Dry the spot immediately with a second soft cloth.
If the mark does not disappear after one or two gentle attempts, stop rather than applying more pressure. Continued rubbing can cause more visible damage than the original stain. Touch-up paint may provide a better solution, especially on dark colors or older walls. Always test any cleaner in an inconspicuous area first, since even water can affect weakened or chalky paint.
Wash eggshell and satin paint with mild soap, warm water, and a well-wrung cloth
Eggshell and satin finishes are usually more washable than flat paint, though they still need careful treatment. Add one or two drops of mild dish soap or Castile soap to half a gallon of warm water, following Clean Mama’s mild soap guidance. Dip a microfiber cloth into the solution, then wring it out thoroughly.
Clean one small section at a time using light, consistent strokes. Do not let water run down the wall or collect along the trim. After washing, use a second cloth dampened with clean water to remove soap residue. Dry each section as you go to prevent streaks.
If the paint is old, cracked, chalky, or peeling, test the solution behind a door or near the floor. A mild cleaner can still affect a weakened finish. Avoid abrasive sponges, rough brushes, and excessive pressure, particularly around corners and high-touch areas where paint may already be worn.
Wash semi-gloss and gloss paint thoroughly without scrubbing aggressively
Semi-gloss and gloss paint generally handles washing better than matte paint because its smoother surface absorbs less moisture. Begin by dusting the wall, then use warm water with a small amount of mild soap to remove fingerprints, everyday dirt, and light grease. A microfiber cloth or nonabrasive sponge is suitable for most areas.
You can use slightly more moisture than you would on flat paint, but do not soak the wall. Work from the top down, rinse away soap with a clean, damp cloth, and dry the surface afterward. This removes residue that could otherwise leave a dull film.
Avoid abrasive pads and forceful scrubbing, even when the finish appears durable. Aggressive cleaning can dull the sheen and leave fine scratches that show in bright light. If you need a stronger product for grease or buildup, test it in a hidden area first and follow the label instructions.
Check whether wallpaper allows water before cleaning it
Wallpaper may be washable, vinyl-coated, paper-based, or textile-based, and each type responds differently to moisture. Check the manufacturer’s care instructions if they are available. If you cannot confirm the material, begin with dry dusting and avoid wet cleaning until you have tested a hidden area.
For washable wallpaper, use a barely damp cloth and a small amount of mild soap only when needed. Work gently, avoid soaking seams, and dry the surface immediately. Never spray cleaner directly onto wallpaper. Liquid can seep behind the sheets, causing lifting, bubbling, or stains.
Paper and fabric wallpaper may require professional cleaning rather than wet treatment. Avoid scrubbing printed designs or pressing hard around seams. The Wallcoverings Association’s cleaning guidance offers additional care information for different wallpaper types. If the wallpaper is already loose, bubbled, or damp, address the underlying issue before cleaning.
Dust textured walls, plaster, and wood paneling before gentle spot cleaning
Textured walls collect dust in raised areas and grooves, so always begin with dry cleaning. Use a soft duster, microfiber cloth, or vacuum brush attachment with light pressure. Work from the ceiling downward so loosened dust does not settle on areas you have already cleaned.
For a remaining mark, use a barely damp cloth and treat only the affected spot. Plaster can be porous and may soften, stain, or crumble when exposed to excess water. Keep the cloth damp, not wet, and dry the area as soon as you finish.
Wood paneling also needs careful treatment because moisture can swell boards, affect joints, or change the finish. Avoid saturating seams or leaving damp cloths against the surface. If the paneling is waxed, oiled, stained, or unfinished, check its care instructions before applying soap or household cleaner.
Use suitable methods for tile, grout, brick, and concrete walls
Tile generally tolerates gentle washing, but grout can absorb moisture and hold onto dirt. Use warm water with a small amount of mild soap, then wipe with a soft cloth or nonabrasive sponge. For stubborn grout marks, use a soft brush with light pressure. Rinse away residue and dry the wall to reduce streaks and water marks.
Brick and concrete are more porous, so avoid flooding them with water. Remove loose dust first, then spot-clean with a small amount of mild solution. A baking soda paste may help with some stubborn marks, but test it before applying it more widely.
A melamine sponge can remove scuffs from some hard surfaces, but it acts like a fine abrasive. Use it sparingly and with very light pressure, especially on painted, sealed, or glossy areas. Stop if the surface changes color or sheen.
Start with clean water and mild soap before trying vinegar or stronger products
Plain warm water is often enough for dust, light fingerprints, and recent marks. If water alone does not work, add a small amount of mild soap and test the solution in an inconspicuous area. This approach limits unnecessary exposure to stronger chemicals and helps protect paint, wallpaper, and sealants.
For a deeper clean on a suitable washable surface, a diluted vinegar solution may be appropriate. Clean Mama recommends mixing two tablespoons of white vinegar with half a gallon of warm water. However, vinegar is not suitable for every material. Avoid it on natural stone, unsealed grout, and surfaces that may react to acids.
Never mix vinegar with bleach or other cleaning products. Use one product at a time, ventilate the room, and rinse away residue with clean water. If a stain does not respond to mild treatment, identify the wall material and stain type before choosing a stronger cleaner.
Choose fragrance-free or eco-conscious cleaners for sensitive households, pets, and staff
Fragranced products can irritate people with allergies or sensitivities, particularly in bedrooms, nurseries, rental properties, and shared workplaces. A fragrance-free, low-residue cleaner is often a practical choice for these settings. Read the label and follow its dilution instructions. Using more product does not necessarily produce a cleaner wall.
Keep the room ventilated while you work, and move children and pets away from wet surfaces and cleaning supplies. Store products securely after use. For commercial spaces, select cleaners with clear ingredient and safety information so staff understand how to use them properly.
The EPA’s Safer Choice program identifies products that meet specific safety and performance standards. Regardless of the product you choose, apply it to a cloth instead of spraying the wall directly. Use only enough moisture to remove the dirt, then wipe away residue and dry the surface.
What Is the Best Way to Wash Walls Without Streaks?
The best way to wash walls without streaks is to use minimal moisture, gentle pressure, and a consistent routine. Streaks often appear when soap, dirt, or water dries unevenly, so avoid washing a large area with a dripping cloth. Instead, work in small sections, rinse away residue, and dry each area before moving on.
Before you begin, check the paint finish and test your cleaning solution in an inconspicuous spot. Flat and matte paint can mark easily, while eggshell, satin, semi-gloss, and gloss finishes typically tolerate gentle washing better. If you are preparing a home for new occupants, careful wall cleaning can make rooms feel fresher without leaving visible water marks.
Work from top to bottom in small sections
Start near the ceiling and work downward in sections about 1 to 2 feet wide. This helps prevent dirty water from running over areas you have already cleaned. Use overlapping strokes so you do not leave visible rectangles or missed strips between sections.
Clean one section, rinse it, and dry it before moving on. This routine gives you better control over moisture and makes it easier to spot streaks while they are still easy to correct. Clean Mama recommends working in small sections and wiping from top to bottom to keep the process organized.
When cleaning around furniture, trim, or moving boxes, finish one accessible area at a time. Avoid stretching across the room with a wet cloth, since this can lead to uneven pressure and accidental drips.
Use a barely damp microfiber cloth or clean white sponge
Choose a clean microfiber cloth or soft white sponge, then dampen it with your cleaning solution. Wring it out until it feels barely damp, not wet. Too much water can seep into seams, damage unsealed surfaces, or leave paint looking patchy as it dries.
A white cloth helps you see how much dirt you are removing and reduces the chance of transferring dye onto light-colored paint. Fold the cloth into quarters and turn it to a clean side as soon as the current side becomes dirty.
Avoid colored scrub pads, rough sponges, and abrasive tools. They can scratch the surface or create shiny patches, especially on flat paint. For painted walls, Pine-Sol recommends using a wrung-out cloth or sponge instead of saturating the wall.
Separate washing and rinsing water for larger areas
Use two buckets when washing a large wall. Fill one with your mild cleaning solution and the other with clean rinse water. Dip your cloth into the wash bucket, wring it out, and clean a small section. Then rinse the cloth in the second bucket before returning it to the cleaning solution.
This setup keeps loosened dirt out of your cleaning solution and reduces the chance of spreading grime across the wall. Replace the water when it becomes cloudy or contains visible debris. Fresh water is especially important on pale walls, where residue and streaks are easy to see.
If you only have one bucket, rinse the cloth under running water between sections and refresh the solution regularly. Reusing dirty water can leave a dull film, even when you use the correct cleaning technique.
Wring cloths thoroughly and replace dirty water often
Your cloth should be damp enough to lift dirt, but never wet enough to drip. After dipping it into the solution, squeeze it firmly over the bucket. If water runs down your hand or forms drops on the wall, wring it out again before wiping.
Keep several clean cloths nearby, including a separate one for rinsing. Once a cloth looks gray, feels greasy, or leaves residue behind, place it aside for washing. Dirty tools can create cloudy streaks and spread grime to areas that were already clean.
Take extra care around drywall seams, windows, corners, and chipped paint. Moisture can enter damaged spots and worsen existing problems. For large move-in or move-out jobs, a professional cleaning service can bring enough clean supplies to keep the process controlled.
Wipe with light, consistent motions instead of scrubbing
Apply gentle pressure and use straight vertical strokes or small, overlapping circles. The goal is to loosen surface dirt, not remove the paint. Scrubbing too hard can create shiny patches on matte walls, lift paint from damaged areas, or spread a stain across a larger section.
Begin with the lightest pressure that works. If a mark does not lift, pause and consider what caused it before applying a stronger product. Repeated rubbing is not always safer, especially on older or delicate paint.
Keep your strokes consistent from one section to the next. This helps the wall dry evenly and makes missed areas easier to spot. Guidance from the U.S. General Services Administration also supports using gentle cleaning methods for painted surfaces in commercial settings.
Rinse away soap without over-wetting the wall
Soap residue can dry into dull lines, so rinse each section after washing it. Use a separate cloth dampened with clean water, then wring it out until it is nearly dry. Wipe the area with light, even strokes and keep the cloth moving across the surface.
Do not spray rinse water directly onto the wall. Spraying can create concentrated wet spots and allow moisture to collect along trim, outlets, or seams. A damp cloth provides much better control.
If the wall still feels slippery after one rinse, use a freshly rinsed cloth for a second pass. Avoid adding more soap, since extra product usually creates more residue. When cleaning near an outlet, keep liquid on the cloth and never allow water to enter the electrical opening.
Clean corners, edges, baseboards, and high areas safely
Corners and edges collect dust, but paint may be thinner around trim and seams. Start with a soft, dry brush or vacuum brush attachment to remove loose debris. Then wipe the area with a barely damp microfiber cloth, taking care not to push moisture into gaps.
Clean baseboards separately because they often hold more dirt than the wall above them. Use a fresh section of cloth and wipe along the length of the board. For high areas, use an extension tool with a washable microfiber pad or place a stable step ladder on a level surface.
Never lean sideways from a ladder or stand on furniture to reach the ceiling line. Move the ladder as needed, and ask for help with stairwells, tall entryways, and other difficult areas. Professional commercial cleaning services can handle hard-to-reach surfaces with suitable equipment.
Dry each section to prevent streaks and water marks
Dry the wall as you go instead of waiting until the entire room is washed. Use a clean, dry microfiber cloth and gently wipe the section in the same direction as your cleaning strokes. This removes remaining moisture and helps prevent drip lines, cloudy patches, and water marks.
Inspect each area from different angles before moving on. Natural light can reveal streaks that are difficult to see under overhead lighting. If you notice a mark, use a lightly damp rinsing cloth and dry the spot immediately.
Open a window or run a fan to improve airflow, but avoid pointing a powerful fan directly at a wet wall. Uneven drying can make some sections appear different from others. Let the wall dry fully before replacing furniture or placing moving boxes against it.
How Can You Remove Tough Wall Stains Safely?
Tough wall stains need more than extra scrubbing. The wrong cleaner or too much pressure can remove paint, leave shiny patches, or spread the stain across a larger area. Start by identifying the mark, checking the wall’s finish, and testing your chosen method in a hidden spot.
Use a clean white microfiber cloth, lukewarm water, and a small amount of mild dish soap. Apply cleaner to the cloth instead of spraying the wall, and avoid soaking the surface or mixing products. If you are preparing a home for new occupants, clean the walls after removing furniture and boxes. This gives you better access and reduces the chance of damaging freshly cleaned areas.
Match each treatment to the stain and start gently
Different stains respond to different treatments. Dust, fingerprints, and light scuffs usually need only a damp microfiber cloth. Grease may require diluted dish soap, while crayon and adhesive residue need careful spot treatment. Water stains, mildew, bubbling paint, and peeling wallpaper require further investigation before you clean them.
Begin with the least aggressive method and increase the strength only when necessary. Apply cleaner to the cloth, use light pressure, and check often to see whether paint is transferring. The National Park Service guidance on cleaning painted surfaces recommends testing cleaning methods in an inconspicuous area before treating a visible section.
Lift fingerprints, dust marks, shoe marks, and scuffs with gentle spot cleaning
For everyday marks, mix a few drops of mild dish soap into a bucket of warm water. Dip in a microfiber cloth, wring it out thoroughly, and gently wipe the mark. Follow with a second cloth dampened with clean water, then dry the area with a towel.
For shoe marks and light scuffs, use short strokes instead of vigorous scrubbing. A clean white sponge may help with darker marks, but stop if the paint looks lighter, shinier, or uneven. Flat and matte finishes are especially easy to damage, so keep the cloth barely damp and use minimal pressure. Regular dusting and prompt spot cleaning can prevent small marks from becoming harder to remove.
Treat crayon and pencil marks cautiously after a patch test
Crayon and pencil marks often sit on the paint rather than soaking deeply into it, but removing them can still affect the finish. Start with a dry microfiber cloth for loose residue. If the mark remains, use a barely damp cloth with diluted mild soap and dab from the outside toward the center.
Always patch-test behind a door or near the floor. For crayon, a small amount of baking soda on a damp cloth may help, but use a very light touch because baking soda is mildly abrasive. Avoid knives, cards, and rough sponges, which can scratch the paint. If the mark does not lift easily, stop before creating a larger shiny patch and consider a small paint touch-up.
Remove kitchen grease with mild, paint-safe degreasers
Grease near stovetops, sinks, and dining areas can leave a sticky film that attracts dust. Begin with warm water and a few drops of mild dish soap. Apply the solution to a microfiber cloth, not directly to the wall, and clean one small section at a time.
For heavier buildup, choose a cleaner labeled safe for painted surfaces and follow its dilution instructions. Test it in a hidden area before use. Avoid strong solvents and concentrated degreasers on flat or matte paint, as they may cause discoloration or remove the finish. Rinse with a clean, damp cloth and dry the area promptly. Keep moisture away from outlets, switches, seams, and damaged paint.
Treat permanent marker, ink, and adhesive residue without spreading it
Permanent marker and ink can spread quickly when rubbed with water. Blot around the outside of the mark first, then test a small amount of isopropyl alcohol on a cotton swab in an unseen area. If the paint remains unchanged, lightly dab the stain without saturating the wall. Use a fresh part of the swab as ink transfers, and stop if the paint color comes away.
For adhesive residue, soften the mark with a warm, damp cloth before gently lifting it with your fingertip or a plastic scraper. Do not use metal blades. A small amount of adhesive remover may work, but choose a product approved for the surface, patch-test it, and follow the label. On wallpaper, painted plaster, or other delicate finishes, professional cleaning is safer than experimenting with solvents.
Use melamine sponges sparingly to protect delicate finishes
Melamine sponges remove marks through light abrasion. That same action can dull paint, remove pigment, or create a smoother-looking patch. Use one only after gentler methods have failed.
Wet the sponge, squeeze out excess water, and make a few light passes over the mark. Do not scrub back and forth. Avoid using melamine sponges on flat paint, wallpaper, unsealed plaster, or painted wood unless the manufacturer confirms they are suitable. Wipe the area with a clean, damp cloth and compare it with the surrounding wall once dry. The Paint and Decorating Retailers Association’s consumer advice provides further guidance on caring for painted surfaces and choosing suitable products.
Investigate water stains before cleaning them
A brown or yellow water mark may indicate a plumbing leak, roof issue, condensation, or moisture entering from another room. Cleaning the visible stain without fixing its source often causes it to return. Check nearby ceilings, pipes, windows, exterior walls, and rooms above the affected area.
If the surface is dry and intact after the moisture problem has been repaired, wipe away loose dirt with a dry cloth and clean gently with diluted soap. Do not saturate the area. Persistent staining may need stain-blocking primer and repainting rather than repeated washing. If you rent, photograph the damage and notify the property manager before making repairs.
Stop around mildew, bubbling paint, or peeling wallpaper until you fix moisture issues
Mildew, bubbling paint, soft drywall, and peeling wallpaper can indicate ongoing moisture. Do not seal, scrub, or paint over these signs before finding the cause. Otherwise, the damage may continue beneath the surface and become harder to repair.
For larger areas of visible mold, recurring moisture, or strong musty odors, seek professional advice. The US Environmental Protection Agency’s mold cleanup guidance explains when small areas may be handled by a homeowner and when professional help is more appropriate. Keep children, pets, and anyone with breathing sensitivities away from the area until the area has been assessed and repaired.
Choose touch-up paint, repainting, or specialist help when needed
Some stains permanently change the paint, even after the wall is clean. If the surface is sound, lightly sand only where needed, prime the mark with a suitable stain-blocking primer, and apply matching touch-up paint. Use the same sheen and, if possible, the original paint. Test the color in an inconspicuous spot because paint can change appearance as it ages.
Repainting may be more practical when stains cover a large area or touch-ups look patchy. Hire a specialist for extensive water damage, mold, high walls, fragile wallpaper, or surfaces that require unusual products. Professional residential or commercial cleaners can also handle wall cleaning after a move, when time is limited and furniture, boxes, and fixtures make access difficult. Choose a vetted, insured cleaning service with clear booking details and a spotless guarantee.
How Should You Dry and Maintain Clean Walls?
Drying walls properly is just as important as washing them. Leftover moisture can leave streaks and water marks, and it may damage finishes such as flat paint, wallpaper, or plaster. After cleaning, remove excess water, improve airflow, and inspect the surface before returning furniture to its usual position.
A simple maintenance routine also keeps walls looking clean between deeper appointments. Regular dusting and quick spot-cleaning prevent fingerprints, spills, and scuffs from becoming harder to remove. In homes, rentals, offices, and commercial spaces, a rotating schedule makes wall care easier to manage without washing every surface at once.
Wipe away excess moisture with a dry microfiber cloth
Use a clean, dry microfiber cloth to wipe each section immediately after washing it. Microfiber absorbs moisture effectively and leaves little lint behind, making it a practical choice for painted walls, trim, and baseboards. Work with light, even strokes instead of pressing firmly or rubbing back and forth.
Drying the wall right away helps prevent streaks and water marks, particularly on dark paint and smooth finishes. Keep several cloths nearby so you can replace them as soon as they become damp. Clean Mama recommends drying walls immediately with a clean microfiber cloth to help create an even finish.
Use a dry microfiber mop on larger wall areas
A dry microfiber mop is useful when you are drying tall walls or broad surfaces. Fit it with a clean, dry head and move it gently from the top of the wall downward. Avoid heavy pressure, which can spread moisture unevenly or leave marks on delicate paint.
Check the mop head for grit before placing it against the wall. Dirt trapped in the fibers can scratch or transfer onto the surface. Use a microfiber cloth for corners, narrow sections, and areas around light switches or fixtures. A dry microfiber mop can remove leftover moisture from large areas while helping reduce streaks.
Improve airflow with open windows, fans, or a dehumidifier
Good airflow helps walls dry evenly and reduces the time moisture remains on the surface. Open windows when outdoor conditions allow, or position a fan across the room so air circulates around the wall. Avoid directing strong airflow at one small area, since uneven drying can leave visible marks.
A dehumidifier can be useful in bathrooms, basements, utility rooms, and commercial spaces with limited ventilation. Keep electrical equipment away from wet areas, and follow the manufacturer’s safety instructions. Pine-Sol recommends opening windows or using fans and a dehumidifier to support faster drying.
Check for streaks, residue, bubbling, peeling, and missed spots
Inspect the wall in good light once it feels dry. Look for streaks, cloudy soap residue, fingerprints, and missed areas around corners, light switches, trim, and baseboards. If you find residue, wipe it gently with a clean, barely damp cloth, then dry the area again.
Also check for bubbling paint, peeling edges, soft patches, or new discoloration. These signs may indicate moisture damage rather than ordinary dirt. Stop cleaning the affected area until the underlying problem is assessed. Clean Mama advises testing cleaning methods in a hidden area and checking for streaks or missed spots after cleaning.
Dust walls regularly to prevent dirt and cobweb buildup
Dust walls before dirt has time to settle into textured paint, corners, and trim. Use a soft duster, clean microfiber mop, or vacuum brush attachment, depending on the finish. Start at the ceiling line and work downward so loose dust does not fall onto areas you have already cleaned.
Pay close attention to corners, stairwells, behind furniture, and the edges where walls meet the ceiling. Low-use bedrooms may only need occasional dusting, while entryways and commercial spaces may need it more often. Regular dusting helps reduce dust throughout the home, as Clean Mama explains in its wall-cleaning guidance.
Spot-clean fingerprints, spills, and new marks promptly
Fresh marks are usually easier to remove than dried or layered buildup. Use a soft, barely damp microfiber cloth and a small amount of mild soap only when necessary. Dab or wipe gently, then remove soap residue with a clean damp cloth and dry the spot.
Focus on high-contact areas around door handles, light switches, stair rails, entryways, and children’s rooms. Avoid scrubbing aggressively, even when a mark seems minor, because friction can create a shiny patch on flat or matte paint. Spot-cleaning visible marks and high-traffic areas can help you avoid washing every wall each time.
Set a practical schedule for high-traffic rooms and delicate finishes
Different rooms and finishes need different levels of care. Dust bedrooms and low-use rooms periodically, then wash them when marks or buildup become visible. Entryways, kitchens, hallways, bathrooms, and children’s rooms typically need more frequent attention because they receive more contact and moisture.
Use extra care with flat paint, wallpaper, plaster, and other delicate finishes. These surfaces may be better suited to dusting and occasional spot treatment than regular washing. Add wall care to a rotating cleaning checklist and divide the work by room to avoid using too much moisture at once.
Adjust wall care for homes, rentals, offices, and commercial spaces
A private home may only need routine dusting, prompt spot-cleaning, and occasional deep cleaning. Rental properties often need a careful inspection between occupants, especially around entryways, kitchens, bathrooms, and furniture contact points. Follow the property owner’s instructions before using specialty products or making paint repairs.
Offices, retail spaces, and other commercial properties may require more frequent cleaning because of steady foot traffic and shared areas. Base the schedule on how the building is used, the wall finish, and visible soil levels. For large surfaces or hard-to-reach areas, professional commercial cleaning can help maintain consistent results with less disruption to daily operations.
Protect freshly cleaned walls during move-in and move-out activity
Furniture, boxes, and moving equipment can leave scuffs on walls even after a thorough cleaning. Use clean moving blankets, cardboard, or protective corner guards where appropriate. Avoid dragging furniture near the wall, and leave enough space between stacked boxes and painted surfaces to prevent rubbing.
Allow walls to dry fully before placing furniture against them. During move-out, clean after large items have been removed so you can reach hidden sections. During move-in, schedule wall cleaning before furniture arrives whenever possible. Professional residential cleaning services can also prepare a space before new occupants arrive and help reduce the risk of missed areas.
When Should You Hire Professionals to Clean Walls?
Hiring professionals to clean walls makes sense when the job involves more than a few fingerprints or dusty corners. High ceilings, stairwells, heavy buildup, delicate paint, and large wall surfaces can take hours to clean properly. They may also require equipment and techniques that are difficult to use safely without experience.
Professional wall cleaning is especially helpful before moving into a new home, after removing furniture during a move, or when preparing a rental or workplace for its next occupants. An empty property gives cleaners better access to walls, trim, corners, and baseboards, while a trained team can adjust its approach to suit different surfaces.
You may also want to include wall cleaning in a broader residential or commercial cleaning appointment. This can save time when floors, kitchens, bathrooms, doors, and other areas need attention at the same time. Before booking, mention any high areas, wallpaper, water marks, mildew, peeling paint, or heavy stains so the cleaning team can plan the visit appropriately.
Get help with high ceilings, heavy buildup, and hard-to-reach areas
High ceilings, stairwells, vaulted rooms, and the spaces above cabinets can be difficult to reach without the right equipment. Standing on furniture or overreaching from a ladder creates unnecessary safety risks and often leaves sections of the wall untouched.
A wall-cleaning guide from Clean Mama suggests attaching a cloth to a Swiffer or spin mop for hard-to-reach areas. Professional cleaners can use suitable extension tools while keeping their footing stable. They can also remove cobwebs, dust, smoke residue, and stubborn grime from elevated areas that are easy to overlook during routine cleaning.
Consider hiring help when buildup covers several rooms, has been left for a long time, or cannot be reached comfortably from the floor.
Reduce damage risks on delicate finishes and large wall surfaces
Different wall finishes need different levels of moisture and pressure. Flat and matte paint can mark easily, while older paint, plaster, and some wallpaper may be damaged by excess water or vigorous scrubbing. A method that works on gloss paint may leave a dull patch on a more delicate finish.
Guidance on cleaning painted walls recommends using minimal moisture on flat or matte paint and testing products in an inconspicuous area first. Professional cleaners can assess the surface before choosing a cloth, sponge, or cleaning solution.
This extra care matters when you are cleaning a large wall or several rooms. A small mistake repeated across a broad surface can lead to visible marks and costly touch-ups. Professional help is worthwhile when protecting the existing finish matters as much as removing dirt.
Schedule wall cleaning after removing furniture and boxes
Furniture, boxes, curtains, and wall décor can make cleaning slow and awkward. They also block access to corners, baseboards, and the lower sections of walls. Moving heavy items yourself may cause strain or lead to scratches and spills, especially during a busy move.
Clean Mama recommends moving furniture away from the walls and protecting floors with towels. For the best results, schedule cleaning after bulky items have been removed or placed in the center of the room. An open space lets the team work more thoroughly and reduces the risk of transferring dirt onto your belongings.
If you are cleaning between occupants, book the appointment once the property is mostly empty. This gives cleaners clear access and makes it easier to inspect the walls when the work is complete.
Clean before move-in so new occupants enter fresh, well-maintained rooms
A move-in clean is a practical time to address walls. Empty rooms make it easier to remove dust, fingerprints, shoe marks, scuffs, and cobwebs before furniture covers those areas. Clean walls can also make a rental, home, or office feel more cared for when new occupants arrive.
Every wall may not need a full wash. Clean Mama’s wall-cleaning advice recommends regular dusting and targeted cleaning in high-traffic areas rather than washing sound surfaces without a clear reason. A professional can focus on entryways, hallways, kitchens, bathrooms, and other areas that show the most wear.
This approach limits unnecessary moisture while giving the property a fresh, well-maintained appearance before move-in.
Combine wall cleaning with residential or commercial cleaning
Wall cleaning can often be added to a wider cleaning appointment. Combining services is useful when you also need floors, kitchens, bathrooms, doors, baseboards, or high-touch surfaces cleaned. One scheduled visit can be more convenient than organizing separate appointments for each task.
Homes may need extra attention in hallways, entryways, kitchens, and playrooms. Commercial properties often require regular care around entrances, corridors, break rooms, waiting areas, and service spaces. A rotating schedule can help prevent grime from becoming difficult to remove.
It is also helpful to keep leftover paint for small touch-ups when possible. Clean Mama recommends keeping extra paint available if minor repairs are needed after cleaning. Ask your provider which wall areas can be included in the same residential or commercial appointment.
Choose vetted, insured cleaners for consistent, safer results
Cleaning walls involves more than wiping a surface. The cleaner needs to recognize the finish, control moisture, protect nearby belongings, and notice signs of a larger issue. Bubbling paint, peeling areas, mildew, and recurring water marks may indicate moisture damage that cleaning alone will not resolve.
Vetted and insured cleaners offer added reassurance when someone is working in your home, rental, or business. The team should inspect the walls and test its chosen method in a hidden area before treating a larger section. This follows the recommendation to test cleaning methods in an inconspicuous spot, even when a product appears gentle.
Insurance also helps protect you if accidental damage occurs during the appointment. When comparing services, look for clear descriptions of the work, trained cleaners, and coverage that suits your property.
Book online in seconds and rely on the spotless guarantee
When walls need attention before a move, after a move, or alongside regular cleaning, online booking keeps the process straightforward. Share the property details, select a service, and mention concerns such as high ceilings, delicate wallpaper, grease, water marks, or heavy buildup. These details help the cleaning team prepare for the appointment.
A spotless guarantee gives you added peace of mind. If an area does not meet the agreed standard, you have a clear way to request follow-up attention. This can be particularly useful when preparing a rental, selling a property, or meeting a move-in deadline.
Choose a cleaning service with vetted, insured cleaners, convenient online scheduling, and a guarantee that stands behind the finished work.
Frequently Asked Questions
Can I clean walls before moving into a home? Yes. Wall cleaning is often easier before furniture and boxes arrive. Start with dusting, then spot-clean fingerprints, scuffs, and other marks using a barely damp microfiber cloth. Allow the walls to dry fully before placing furniture against them.
How often should walls be cleaned? Dust walls periodically and spot-clean visible marks as soon as they appear. High-traffic areas, kitchens, entryways, hallways, and children’s rooms may need more frequent attention than bedrooms or low-use spaces. Delicate finishes, such as flat paint and wallpaper, usually need less wet cleaning.
What should I do if cleaning causes paint to come off? Stop cleaning that area immediately and let it dry. Paint transfer may indicate a fragile, chalky, or damaged finish. Avoid applying more pressure or stronger products. Depending on the damage, the wall may need touch-up paint, repainting, or professional assessment.
Can professional cleaners wash walls with wallpaper or textured finishes? They can often clean these surfaces, but the method depends on the material and its condition. Wallpaper, plaster, and textured walls may need dry dusting or limited spot cleaning rather than traditional washing. Mention the wall type and any bubbling, peeling, or moisture damage when booking.
Should wall cleaning be part of a move-in or move-out clean? It can be a useful addition, particularly after furniture has been removed. Professional cleaners can reach corners, baseboards, high areas, and sections hidden behind belongings. When booking, share details about stains, delicate finishes, high ceilings, or water marks so the team can plan appropriately.