How to Clean Baseboards Thoroughly
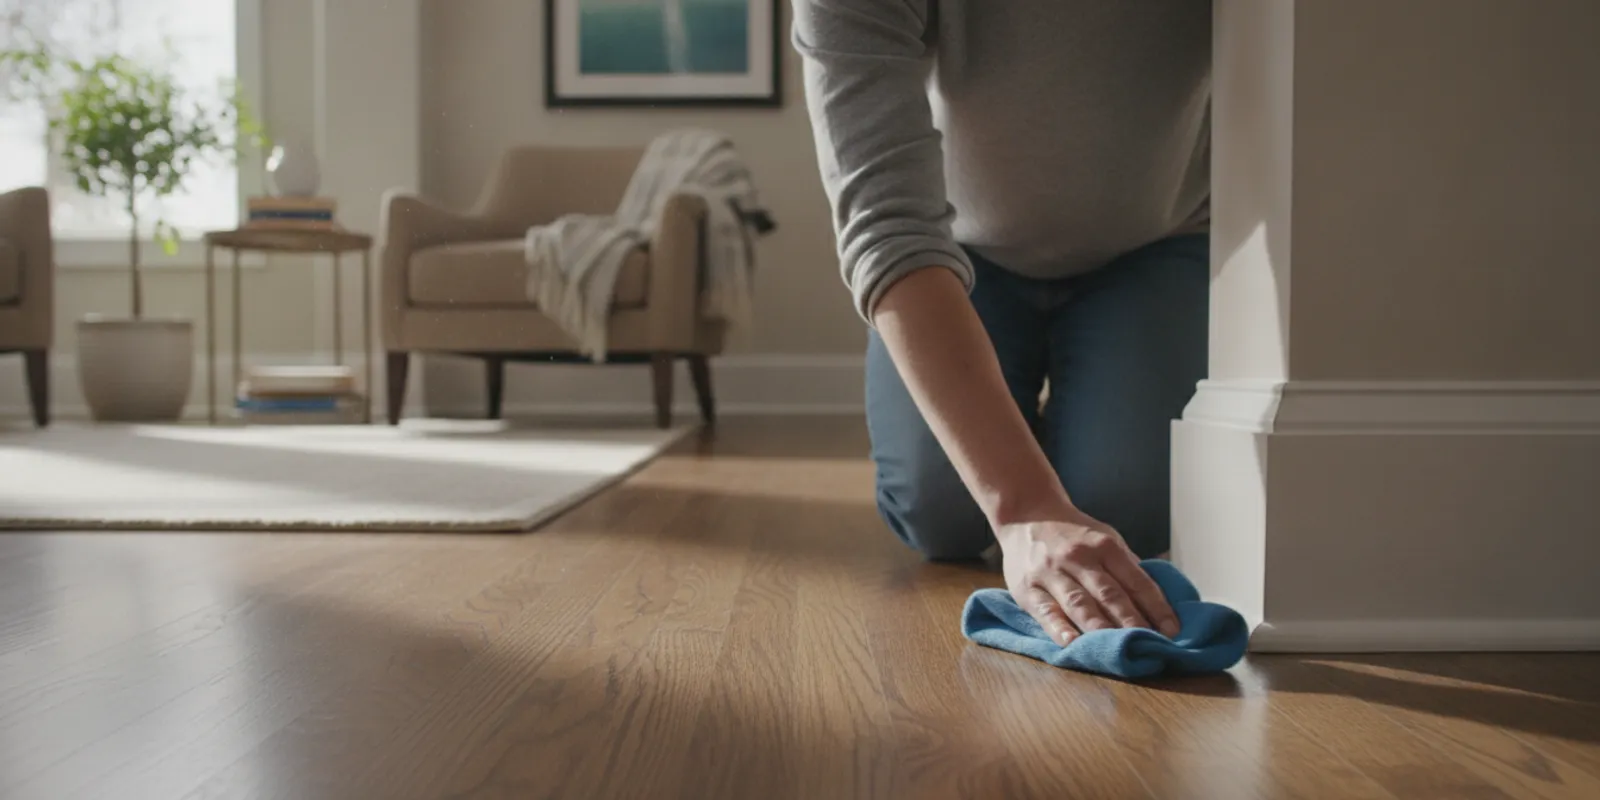
Learning how to clean baseboards is easier when you use a consistent sequence instead of scrubbing every mark as soon as you see it. Baseboards collect dust, pet hair, floor debris, fingerprints, cooking residue, and splashes. They also sit close to flooring and wall surfaces that can be damaged by too much water or the wrong product. A careful room-by-room process starts dry, uses limited moisture only when the finish allows it, and ends with a drying and inspection step.
What makes baseboards difficult to clean?
Baseboards look like a narrow strip of trim, but they have several surfaces that collect different kinds of soil. The top ledge catches loose dust. The front face shows fingerprints, shoe marks, and splashes. The lower edge gathers lint and hair. The seam where trim meets the floor can hold grit, while corners and joints may collect a compacted line of dirt. A single quick pass across the middle often leaves the most visible edges untouched.
The material and finish matter as well. Painted wood, stained wood, varnished trim, vinyl, composite trim, and older or unknown surfaces do not all respond to water and cleaner in the same way. A finish that tolerates a damp cloth in one room may be less stable in another room. Paint may be chalky, fresh, peeling, or worn. Wood can swell if moisture reaches an open seam. Even a hard-looking surface can develop a dull or sticky area after too much rubbing or an incompatible product.
The safest goal is not to make every mark disappear at any cost. The goal is to remove ordinary surface soil while preserving the finish and recognizing when a mark is damage, discoloration, or a repair issue. That distinction keeps a routine clean from becoming an avoidable problem.
What should you gather before cleaning?
Gather your tools before you begin so you do not carry a wet cloth through a room looking for something else. The basic kit can be small:
- A vacuum with a soft brush or upholstery-style attachment.
- Clean microfiber cloths, with separate cloths for dry dusting, damp wiping, and drying.
- A soft detail brush for corners, grooves, and the lower edge.
- Warm water and a mild cleaner approved for the surface, if a cleaner is needed.
- A small container rather than a large bucket when you are cleaning only trim.
- A dry towel for catching drips near flooring and drying the finished section.
- Stable access equipment if a high or difficult area cannot be reached safely from the floor.
- Painter-friendly protection for adjacent flooring when the floor material is sensitive to moisture.
Use a fresh cloth with a low-lint surface. A cloth that has already collected grit can drag particles across paint and create faint scratches. Fold each microfiber cloth into quarters. This gives you several clean faces to rotate as one side becomes dusty or soiled. Keep the dry and damp cloths separate so you do not accidentally spread moisture while removing loose debris.
Read the instructions for any cleaning product before using it. Do not assume that a product designed for floors, glass, kitchens, or bathrooms is suitable for painted trim. Never mix cleaning products. Avoid abrasive powders, rough pads, sharp tools, strong solvents, and concentrated solutions unless a manufacturer specifically identifies the product as suitable for the exact surface.
How should you inspect the trim first?
Walk around the room before touching the baseboards. Look at the top ledge, front face, lower edge, corners, seams, nail holes, and floor line. Note loose dust, pet hair, sticky residue, scuffs, peeling paint, swelling, dark moisture marks, crumbling caulk, and areas hidden behind furniture. This initial look helps you choose a method and gives you a way to compare the result later.
Identify the finish when you can. Painted baseboards may be glossy, satin, semi-gloss, matte, old, or recently coated. Stained or varnished wood may require a finish-specific product. Vinyl and other manufactured trim may tolerate a different method, but the surface should still be tested. If you cannot identify the material or its condition, begin with dry dusting rather than water.
Test the planned damp method in a small, inconspicuous spot. Use the same cloth, amount of moisture, and cleaner concentration that you expect to use on the visible area. Let the test spot dry before judging it. Stop if color transfers to the cloth, the finish becomes tacky, the sheen changes, the paint softens, or the surface looks swollen. A hidden test is useful because a wet surface can appear acceptable until it dries.
Cleaning removes surface soil; it does not repair failing paint, water damage, open joints, swollen wood, or permanent discoloration. If a baseboard has a dark moisture mark, peeling coating, or material that moves when touched, do not saturate it in an attempt to make it look clean. Photograph existing damage before a rental inspection, sale, move-related clean, or maintenance visit so the condition is documented separately from the cleaning work.
What is the most efficient room-by-room plan?
Choose a route before you start. Begin near the room entrance and move in one direction around the perimeter. Divide long walls into manageable sections, and finish each section through drying and inspection before moving on when possible. This method reduces missed corners and keeps you from walking repeatedly across a floor that you have already cleaned.
- Inspect the room, note the finish, and identify damaged or blocked areas.
- Clear small objects from the floor and top ledge.
- Dry-dust the baseboards from the top edge downward.
- Vacuum loosened dust, hair, and grit from the trim and floor line.
- Test a mild damp method in a hidden area if damp cleaning is appropriate.
- Wipe a short section with a well-wrung cloth, using light pressure.
- Dry the section, inspect it from more than one angle, and continue only if it looks stable.
- Clean corners, joints, door casings, and the floor line without forcing moisture into seams.
- Finish the floor perimeter after the baseboards so fallen debris is removed last.
Work from top to bottom because loosened dust falls downward. If you wet the trim first, dust may turn into a gray film that takes more effort to remove. Likewise, clean the baseboards before vacuuming or mopping the adjacent floor. The floor step is the final collection step for particles that fall during the process.
Move only light furniture that you can handle safely. Do not drag heavy pieces across flooring or stretch around them from an unstable position. Mark a blocked area and return when access is safe. In an occupied home, a route that is slightly slower but controlled is better than moving every object at once.
How do you remove loose dust and pet hair?
Start with a soft vacuum brush, a clean microfiber cloth, or a soft duster. Cover the top lip first, then the front face, lower edge, corners, and gap near the floor. Keep the vacuum close so loosened debris does not scatter across the room. Use a soft detail brush to work dust out of a groove while holding the vacuum nozzle nearby, but keep the nozzle from scraping the trim.
Pet hair and lint often cling to the lower edge or collect where the wall meets the floor. A vacuum brush is usually more effective than a wet cloth for this material. If hair is wrapped around a corner or caught in a rough spot, loosen it gently with a soft brush rather than picking at the finish with a sharp object. Rotate the cloth to a clean face as it gathers debris.
Check places that are easy to overlook: behind doors, beside heating or cooling vents, near wastebaskets, along entryways, behind sofas, and beside pet beds. Look at the top edge from standing height and at the floor line from a lower angle. Dust can be nearly invisible from across the room but obvious along a narrow ledge when light hits it.
Do not wet renovation dust, loose grit, or unidentified powder. Remove loose material with a suitable soft vacuum method first. If the residue could be construction material, adhesive, paint, or another unknown substance, avoid rubbing it into the finish. Cleaning an unidentified residue may require a different approach than removing ordinary household dust.
How should you damp-clean painted baseboards?
Once loose debris is gone, prepare a mild solution only if the painted surface passed the test. Follow the product label rather than adding extra cleaner. Dampen a microfiber cloth and wring it until it is moist but not dripping. The cloth should not leave a wet trail when you wipe a small section.
Work in short sections, beginning at the top and moving downward. Use light, even strokes instead of pressing hard on a single mark. Apply cleaner to the cloth rather than spraying the baseboard. Direct spraying can send liquid onto the wall, floor, outlets, appliance edges, open seams, or nearby objects. It also makes it harder to control how much moisture reaches a narrow piece of trim.
Use a separate rinsing cloth only when the product directions call for rinsing. Then dry the section with a clean towel. Pay particular attention to corners, joints, nail holes, and the floor line, where moisture can remain longer. If the paint is matte, old, chalky, or peeling, dry dusting may be the safer choice. Do not assume that stronger rubbing will improve a fragile coating.
Fresh paint needs time to cure according to the coating maker's guidance. A surface can feel dry while the film underneath remains vulnerable to water, pressure, or cleaning chemicals. If you do not know when the baseboard was painted, use a dry method or ask for the product information before attempting damp cleaning.
Stop immediately if paint color transfers to the cloth or if the surface changes. Do not keep wiping in the hope that the change will even out. Document the area and treat repair or repainting as a separate task.
How do you clean stained wood and varnished trim?
Stained and varnished wood deserves extra caution because the appearance depends on both the wood and its finish. Begin with a soft dry cloth or vacuum brush. Remove dust from the top edge, face, lower edge, and carved details without pushing debris into an open joint.
If the finish is known, use only a product approved for it and follow the directions. If the finish is unknown, stay with dry dusting until you can obtain care information. A well-wrung cloth may be acceptable for some stable finished wood, but it is not automatically appropriate for every stained surface. Keep water away from end grain, seams, joints, and places where the coating is worn through.
Do not use furniture polish, oil, wax, or a solvent simply because the wood looks dry. Such products can leave a film, change the sheen, attract dust, or interfere with later refinishing. A clean appearance comes from removing soil without adding an unneeded layer. Test any approved product in a hidden spot and wait for it to dry.
Older trim may have uneven color that is part of its existing condition. If a spot remains after gentle cleaning, compare it with the surrounding wood. It may be wear, sun exposure, finish loss, or discoloration rather than dirt. Repeated rubbing can make that contrast more noticeable.
How should you approach vinyl or an unknown surface?
Vinyl and manufactured trim often have a more uniform surface, but the label or maker's care guidance still controls. Remove dust first with a vacuum brush or soft cloth. Test a small area before using a damp cloth, especially if the trim has a printed, textured, or aged finish.
For an unknown surface, use the least aggressive process first. Dry dusting may remove most of the buildup. If a damp wipe is necessary, use plain water on a well-wrung cloth in a hidden location and let it dry. Do not move to a stronger product merely because the surface did not respond instantly. Check for a change in sheen, color, texture, or tackiness before continuing.
Do not scrape adhesive, paint transfer, or hardened residue with a knife or metal edge. A hard tool can gouge plastic and remove a coating from wood. If the residue does not respond to a gentle, compatible method, identify the substance or ask a professional before escalating.
How can you clean corners, grooves, and floor lines?
Details are where a baseboard cleaning routine becomes complete. Use a soft detail brush to loosen dust from inside corners, grooves, and the space under a projecting ledge. Hold the vacuum nearby. Brush outward rather than pushing debris deeper into the joint.
For the floor line, use a well-wrung cloth and short strokes. Protect moisture-sensitive flooring with a dry towel, and wipe any drips immediately. Do not force a cloth into a cracked caulk joint or open seam. Moisture trapped behind the trim can cause a problem that is harder to see than the original dirt.
Door casings and the short return beside a doorway are easy to skip when you follow a wall. Include them in the same route, but inspect the finish separately if the casing has a different material. Pay attention to corners where baseboards meet door trim. These areas can collect lint and may show shoe marks from people turning through the doorway.
Use safe access. Do not balance on furniture, kneel on an unstable object, or stretch until your center of balance shifts. A stable position lets you control the cloth and avoid bumping walls, furniture, and flooring.
How do you remove scuffs and sticky buildup?
Begin with the gentlest method that passed your surface test. Use a clean cloth lightly dampened with water if the finish allows it. Wipe a small area evenly rather than rubbing only the center of a mark. Cleaning around a mark but not beyond it can leave a visible halo, while aggressive spot rubbing can create a shiny patch.
For sticky residue, hold the damp cloth against the spot briefly to soften ordinary residue, then wipe without soaking the trim. Use a fresh section of cloth when the residue transfers. Dry the area and inspect it before repeating. If there is no improvement after one careful pass, stop and identify the residue rather than applying progressively stronger chemicals.
Abrasive sponges, concentrated degreasers, rough scrapers, and untested solvents can remove paint or change the sheen. They can also spread adhesive across a larger area. A mark that does not transfer may be paint wear, finish loss, embedded soil, or material discoloration. Stronger chemicals and harder rubbing cannot restore worn paint.
Some black marks are transfer from shoes, furniture, toys, or floor equipment. Others are scuffs in the coating itself. Compare the mark under dry and angled light. If the surrounding finish looks different after gentle wiping, the surface condition may be the real issue.
How does the method vary by material?
| Surface | Start with | Damp approach | Main caution |
|---|---|---|---|
| Stable painted wood | Soft vacuum brush | Well-wrung cloth with compatible mild cleaner | Dry seams and stop if color transfers |
| Matte or older paint | Dry microfiber cloth | Only after a careful hidden test | Pressure and moisture may change the finish |
| Stained or varnished wood | Soft cloth or brush | Approved finish-specific method | Avoid soaking and unapproved polish |
| Vinyl or manufactured trim | Vacuum brush | Mild compatible method if allowed | Test textured or aged surfaces |
| Unknown or damaged finish | Dry dusting | Do not proceed without testing | Keep moisture away from peeling or swollen areas |
This table is a starting point, not a substitute for care instructions. Two baseboards that look similar may have different coatings. Test each distinct surface, even when the rooms are next to one another. When in doubt, removing dry dust is safer than experimenting with multiple products.
How should you adapt the process to the kitchen?
Kitchen baseboards may collect cooking residue in addition to ordinary dust. Dry-dust first so you do not turn loose grit into a paste. Then test the mildest compatible damp method on a small section. Work near, but not directly into, appliance edges and cabinet joints. Keep spray away from outlets, cords, controls, and ventilation openings.
Use a small amount of moisture and change cloth faces frequently. A dirty cloth can spread a thin film along the entire baseboard. If a backsplash, cabinet, or appliance has a different finish, keep its cleaning method separate. Do not assume that a product safe for a countertop is safe for painted trim.
Wipe fresh splashes when it is safe to do so, but do not let a quick response replace periodic inspection. Cooking residue can be subtle along a narrow ledge. Look at the trim under side light and check the top edge near work areas.
What changes in entryways, halls, and living areas?
Entryways and halls collect grit from shoes, bags, and outdoor debris. Vacuum the floor perimeter and baseboard before wiping. Grit left on the surface can act like an abrasive when moved by a damp cloth. Entry mats can reduce what reaches the floor line, but they still need regular care.
Living rooms often have baseboards hidden behind sofas, cabinets, and media furniture. Clean the accessible perimeter first and do not drag heavy furniture alone. When an area cannot be reached safely, record it and address it during a planned furniture move or a larger cleaning visit. A narrow gap is not a reason to push a wet cloth where you cannot see the result.
Bedrooms may have hair and dust along the lower edge, especially near beds and dressers. Use a vacuum brush and inspect behind doors. Children's rooms can have fingerprints, crayons, stickers, and unknown residue. Do not scrape or use a solvent on an unidentified mark until the finish and the substance are understood.
How should you handle homes with pets or children?
Pet hair tends to gather at corners, under furniture, and near sleeping areas. Remove it dry before using moisture. If a pet has access to the room, keep cleaning products and damp cloths out of reach and allow the surface and floor to dry before normal activity resumes.
Children can touch baseboards, so use only products suitable for the surface and follow their labels. Store products safely while you work. Do not leave a bucket, open container, or wet towel in a walkway. If a baseboard has crayon, food, or adhesive, use a small test area rather than rubbing the entire wall of trim.
Safety also includes the person cleaning. Keep cords out of walking paths, maintain a stable stance, and take breaks during a whole-home project. A rushed cleaning session is more likely to involve excessive water, a missed corner, or an unsafe reach.
What should you do after remodeling or construction?
Post-remodel dust deserves a slower approach. Remove loose material with a suitable vacuum method before wiping. Do not use a wet cloth on powder that may contain grit or an unknown substance. Rubbing can spread residue into the paint or create scratches.
Inspect the baseboards for paint splatter, caulk, adhesive, drywall material, or damage from installation. These substances may require a trade-specific method rather than ordinary household cleaning. Never use a sharp scraper on finished trim without understanding the risk. If a surface has been newly painted, wait for the coating to cure according to its maker's guidance.
When a remodel involved cutting, sanding, or replacing flooring, clean the room in stages. Remove large debris, vacuum loose dust, inspect the trim, and only then consider a controlled damp wipe. Keep the floor protection in place until the work area is no longer producing dust.
How often should you clean baseboards?
There is no single schedule for every home. Frequency depends on pets, foot traffic, cooking, ventilation, flooring, children, and how often people touch the trim. Dry-dust when a visible film, hair, or lint appears. Damp-clean when fingerprints, splashes, or ordinary grime remain after dusting and the finish tolerates moisture.
Entryways, halls, kitchens, and rooms where pets spend time may need attention more often than guest rooms or rarely used areas. A quick inspection while vacuuming can tell you whether a room needs a full wipe. You do not need to damp-clean every baseboard every time you clean the floor.
Use the condition of the surface as a guide. If the baseboard is dusty but the paint is delicate, dry dusting may be the appropriate maintenance step. If a stable painted surface has a recurring splash near a kitchen or door, address the cause and clean the affected section before residue builds.
How can you prevent buildup between cleanings?
Use a soft vacuum attachment along the room perimeter during regular floor care. This removes hair and loose dust before it becomes a damp-cleaning project. Keep entry mats clean, wipe safe-to-remove splashes promptly, and watch the floor line in rooms with high traffic.
Notice repeat patterns. If one corner continually collects hair, consider whether a pet bed, furniture arrangement, or airflow contributes. If one kitchen section repeatedly gets splashed, inspect that area during routine cleaning and adjust how nearby surfaces are used. Prevention is often a matter of short dry passes rather than frequent heavy scrubbing.
Keep furniture accessible where practical, but do not create a safety issue just to reach a narrow strip. Plan a deeper perimeter clean when furniture can be moved safely. Maintaining a simple room list can help: note the rooms that need dry dusting, the rooms that tolerate damp cleaning, and any areas that need repair rather than more cleaning.
Choose cloths and tools that remain clean. A vacuum brush clogged with hair can redeposit debris. Wash or replace cloths according to their care instructions, and do not store a damp cloth folded in a closed container. Clean tools support a cleaner result and reduce the chance of transferring soil from one room to another.
What mistakes should you avoid?
- Skipping dry dusting and turning loose debris into streaks.
- Using more water or cleaner than the product directions require.
- Spraying directly onto trim, walls, floors, outlets, or appliance edges.
- Using one dirty cloth throughout the room or whole home.
- Scrubbing a spot before testing the finish.
- Using abrasive pads, powders, rough scrapers, or untested solvents.
- Cleaning the floor before the dusty baseboards.
- Forcing a wet cloth into a cracked seam or open caulk joint.
- Ignoring peeling paint, swelling, dark moisture marks, or loose trim.
- Assuming a product safe for one material is safe for every room.
- Judging the result while the surface is still wet.
- Moving heavy furniture or reaching from an unstable position.
Most of these mistakes come from trying to finish too quickly. A dry first pass, a small test, short sections, and a drying pause usually produce a better result than a stronger product or harder pressure. When a mark does not improve with a gentle method, stop and identify the reason.
How can you check the finished work?
Inspect each section after it dries. Look at the top edge, face, lower edge, corners, door casings, and floor line. View the baseboard from standing height and from a lower angle so side light can reveal streaks or remaining dust. Dry any damp areas before moving furniture back.
If a streak remains, decide whether it is residue, a dirty-cloth trace, uneven moisture, or existing wear. Use a fresh, lightly damp cloth only if the finish remained stable during the first pass. Do not keep rubbing an area that is becoming shinier or lighter than the surrounding surface.
Check the adjacent floor for fallen debris and drips. Vacuum or mop the floor perimeter using a method suitable for that floor material. Replace small objects only after the baseboard and nearby floor are dry. If you are preparing for a rental inspection, sale, or move, note repair needs separately so they are not confused with cleaning tasks.
How can you manage a whole-home project?
For a whole-home clean, make a simple map of the rooms and mark access, finish type, visible soil, and areas that need special care. Group rooms with similar tools when convenient, but do not let efficiency override a surface test. A modern painted hallway and older stained trim in a bedroom may need different methods even if they are cleaned on the same day.
Carry dry cloths, a soft brush, a vacuum attachment, a small container, and drying towels. Use a limited amount of solution and refresh it when it becomes visibly dirty. Change cloth faces before they look soiled. Keep cords and containers out of walkways. If you are interrupted, finish one room through drying and inspection before starting another.
At transitions between materials, pause and identify the change. A corner may contain painted wood on one wall and vinyl on another. Use a small folded cloth and avoid pushing moisture into the joint. Remove dust from grooves before wiping the flat face. Keep a note of any spot that did not respond so you do not repeatedly treat it with stronger products.
For a move-in or move-out clean, inspect behind accessible furniture and along empty-room walls. Photograph existing damage when appropriate. An empty room makes the floor line easier to see, but it can also expose marks that were hidden behind furniture. Treat repair, paint touch-up, and cleaning as separate parts of the preparation.
What if the baseboards are heavily soiled?
Heavy buildup calls for careful preparation, not automatically stronger chemicals. First decide what the material may be: ordinary household soil, cooking splash, adhesive, paint transfer, tracked grit, or an unknown substance. Remove loose debris and test a mild compatible method on a small section.
Work slowly enough to see whether the cloth is actually lifting soil. Dry the section before deciding whether another gentle pass is safe. Use a clean cloth face and stop if the finish changes. Repeatedly rubbing the same spot can cause more visible damage than the buildup itself.
A mark that does not transfer may be embedded soil, coating loss, or discoloration. Compare it with nearby trim and inspect under dry light. Keep water away from swelling, peeling, and dark moisture marks. If the surface is loose or deteriorating, cleaning should pause while the repair need is assessed.
Do not make a whole-home solution stronger because one room is difficult. Different soil may require a different diagnosis, and a stronger product can damage trim in every other room. If the buildup is outside ordinary household cleaning or the finish is valuable, delicate, or unknown, ask a qualified cleaning professional what information they need before beginning.
When can professional cleaning help?
Professional cleaning can help when baseboards are part of a larger deep clean, recurring home cleaning, commercial cleaning, or move-in/move-out cleaning plan. It can also help when you have many rooms to coordinate, limited time before a move, difficult access, or a mixture of surfaces that need separate handling.
Before an appointment, share useful details: the type of property, rooms that need attention, delicate or recently painted finishes, peeling areas, water damage, heavy buildup, blocked edges, and any product restrictions. Ask what baseboards are included, whether accessible edges are covered, and how the provider handles areas that should not be wet-cleaned. Clear communication helps separate cleaning from repair.
Crystal Clean Collective LLC is a professional home and commercial cleaning provider serving the DMV region. The company offers home cleaning, deep cleaning, commercial cleaning, and move-in/move-out cleaning delivered by vetted, insured cleaners. You can review commercial cleaning services for a business setting or use the contact page to request service information. Simple online booking and the company's spotless guarantee may be useful when you are planning a larger cleaning visit.
How can you choose between a quick touch-up and a full clean?
Not every baseboard needs the same amount of work. A quick touch-up is appropriate when the trim has a light layer of dust, a few hairs, or one fresh fingerprint. Use a dry microfiber cloth or soft vacuum brush, follow the room perimeter, and inspect the obvious edges. This keeps small amounts of soil from becoming a larger buildup without exposing the finish to unnecessary moisture.
A fuller clean is useful when dust has collected in the top ledge, when the lower edge has a visible film, or when ordinary wiping no longer removes fingerprints and splashes. Plan time to inspect the material, test a damp method, work in sections, dry the trim, and clean the floor line. If the room has multiple finishes, treat each surface as its own small project.
Some conditions call for a pause rather than either type of cleaning. Peeling paint, swollen wood, loose trim, active moisture, and unknown chemical residue should be recorded and assessed. A quick touch-up can remove loose dust around a damaged area if it is safe, but it should not conceal or worsen the condition. Matching the intensity of the cleaning to the condition of the trim is one of the best ways to avoid over-cleaning.
How should you work when a baseboard meets another material?
Transitions need attention because they combine surfaces with different moisture tolerances. A baseboard may meet hardwood, tile, carpet, laminate, stone, or another floor material. The wall above it may also have a different paint sheen than the trim. Use the most restrictive care approach at the transition, and keep the cloth damp rather than wet.
Vacuum the joint first. For a hard floor, hold a dry towel close to the baseboard as you wipe. For carpet, avoid transferring a wet or dirty cloth onto the fibers. On flooring that can be affected by standing water, work in small areas and dry immediately. Do not push liquid under the trim or into the gap between the floor and wall.
At a change from one baseboard material to another, stop and change tools if needed. For example, a painted return may be suitable for a tested damp cloth while an adjacent stained casing needs a dry or finish-specific method. A continuous wall does not always mean a continuous cleaning method. Separate the surfaces at the transition so a product chosen for one does not spread onto the other.
How can you clean baseboards without leaving streaks?
Streaks usually come from excess product, uneven moisture, soil left on the surface, or a cloth that is no longer clean. Start by removing dust while the surface is dry. Then use a cloth that is evenly damp, not wet in one corner and dry in another. Wipe a manageable section with overlapping strokes and avoid stopping halfway through a visible panel.
Rotate the folded cloth frequently. When one face becomes gray or greasy, fold to a clean face or replace the cloth. If the product instructions require rinsing, use a separate cloth and do not let rinse water run down the wall. Dry with a low-lint towel, especially along the top ledge and floor line.
Inspect after drying, not immediately after wiping. A wet surface can hide a film or make an uneven sheen look temporary. If a light streak remains, first determine whether it is cleaner residue or an existing difference in the paint. A single careful follow-up pass may be reasonable on a stable, tested finish. Do not repeatedly polish one spot in an attempt to make a worn coating match.
How can you organize tools for several rooms?
Organization helps prevent cross-contamination and makes a long cleaning session less tiring. Keep dry tools together, damp-cleaning tools together, and drying towels in a separate place. Use one cloth group for dusty areas and another for surfaces with cooking residue or sticky soil. Change tools when moving from a visibly dirty room to a cleaner room.
A small caddy can hold folded cloths, a soft brush, and a clearly labeled container. Keep the vacuum attachment nearby, but do not rest a dirty nozzle on the cleaned trim. If you use a solution, prepare only the amount needed for the planned work and follow its directions. Do not leave an open container where a child or pet can reach it.
For a large home, make a simple route list. Note each room, its finish, the method tested, and any areas blocked by furniture. This prevents you from repeating a room or forgetting a hallway. It also provides useful information if a later cleaning visit needs to continue the work. Finish and document a section rather than leaving wet trim behind when you need to stop.
How should renters prepare baseboards for an inspection?
Before a rental inspection, begin by documenting existing chips, stains, peeling paint, swelling, loose trim, and dark marks. A photograph taken before cleaning can show that a condition was present. Then remove loose dust and hair using the gentlest dry method. A clean, dry surface makes it easier to tell ordinary soil from a paint or maintenance issue.
If the finish is stable and the care instructions permit it, test a mild damp wipe in an inconspicuous place. Do not use a harsh product just to make an old mark disappear. Strong rubbing can remove paint and create a condition that was not present before. Avoid soaking the floor line, especially in an older unit where seams or flooring may be vulnerable.
Clean accessible baseboards before the final floor care. Look behind doors, near closets, and along empty walls. For furniture that cannot be moved safely, do not risk injury or property damage. Note the blocked section and clean it when access is available. Keep your before-and-after notes separate from requests for repainting or repair.
How should move-in and move-out cleaning change the process?
An empty property gives you better access to baseboards, but it also exposes more dust, scuffs, and floor-line debris. During a move-out clean, remove loose material from the top down before cleaning the floors. Check walls, door casings, closets, and areas where furniture previously stood. A route that follows the perimeter helps you cover the entire property without repeatedly crossing finished floors.
During a move-in clean, identify the condition before placing furniture. Note any trim that is already damaged, freshly painted, unusually glossy, or still curing. If you are preparing a home for new occupants, clean accessible trim and floor edges, then allow surfaces to dry before boxes and furniture are set against them. A blocked baseboard is harder to inspect and maintain later.
For either type of move-related cleaning, communicate the scope clearly. Baseboards may be part of a broader deep clean, but repair work, paint touch-up, adhesive removal, and treatment of unknown substances may require separate instructions. A written room list helps identify which trim was accessible and which areas need follow-up after furniture or equipment moves.
What should businesses consider for baseboard cleaning?
Commercial spaces may have longer perimeters, higher traffic, and more frequent grit near entrances. A cleaning plan should identify the type of trim, floor material, furniture layout, traffic pattern, and areas near food or waste. Dry soil removal is especially important at entrances because grit can scratch a finish when dragged by a damp cloth.
Schedule detailed work when it will not interfere with occupants, customers, or staff. Keep tools, cords, and cleaning products out of walkways. Mark or isolate damp areas until they are dry. In a business setting, a consistent route and checklist can help different cleaners use the same basic sequence without assuming that every surface takes the same product.
Ask for the care information for specialty trim, recently installed flooring, or surfaces maintained by a building manager. Record areas that are inaccessible because of fixed equipment or heavy furniture. A commercial cleaning scope should state whether accessible baseboards, edges, door casings, and floor lines are included, rather than relying on an assumption about what a routine visit covers.
Crystal Clean Collective LLC serves both homes and commercial spaces in the DMV region. When requesting information, describe the property, the rooms or work areas, the condition of the trim, and whether the service is recurring, deep, or move-related. Those details help a provider understand whether baseboards are a routine part of the requested cleaning or need extra attention.
How can you tell whether a mark is soil or damage?
Begin with observation instead of chemicals. Soil may transfer to a clean cloth, soften with a compatible damp method, or appear unevenly in areas that receive contact. Damage may remain unchanged, follow a crack or seam, expose another color, or alter the texture of the trim. These signs are not a diagnosis, but they can help you decide when to stop cleaning.
Look at the mark when the surface is dry and when light comes from the side. A shiny patch may be burnished paint rather than a wet spot. A dark line at a joint may indicate moisture or failing caulk rather than dirt. A white deposit may be residue, paint wear, or a material issue. Avoid guessing by escalating to an aggressive product.
Use a test cloth on a tiny area if the surface is stable. If no soil transfers and the appearance does not improve, additional rubbing is unlikely to solve the problem. Photograph the area, note its location, and seek appropriate maintenance advice. Cleaning and repair are different tasks, and treating them separately protects the rest of the baseboard.
How can you create a repeatable maintenance routine?
Build the routine around the work you already do. During regular vacuuming, use the soft attachment along accessible baseboards in the rooms that collect the most hair or grit. During a periodic detailed clean, inspect the top ledge, corners, door returns, and floor line. Damp-clean only the surfaces and areas that need it and that have passed a compatibility test.
Keep a short maintenance note for unusual finishes. Record that a particular room should be dry-dusted, that a section is recently painted, or that a mark should be left for repair. This is useful in a busy household, during a move, or when more than one person cleans the property. It prevents a well-intentioned helper from applying a product that was not appropriate.
Review the routine when the home changes. A new pet, a renovation, a furniture rearrangement, or a flooring replacement can change where dust collects and how much moisture is safe. A method that worked before a renovation may need to be retested afterward. The most dependable maintenance plan is one that stays responsive to the material and the room rather than following a rigid calendar.
What is the final baseboard cleaning checklist?
- Identify the material and finish, and note existing damage.
- Gather a soft vacuum brush, clean cloths, a soft detail brush, mild compatible cleaner, and drying towels.
- Clear the route and plan safe access around furniture.
- Dry-dust from the top edge down, including corners and the lower edge.
- Vacuum loosened dust, hair, and grit before adding moisture.
- Test a mild damp method in a hidden spot when the finish allows it.
- Wipe short sections with a well-wrung cloth and light pressure.
- Keep spray off the trim and away from floors, walls, outlets, and seams.
- Dry each section and inspect it before continuing.
- Finish the floor perimeter after the baseboards.
- Record areas that need repair, special care, or safe access later.
Use a steady sequence: inspect first, remove loose soil while dry, apply limited moisture only when appropriate, and stop at the first warning sign. With that approach, you can keep baseboards cleaner between larger cleaning visits while protecting painted trim, wood finishes, vinyl surfaces, and the flooring below them.